
-
-
-
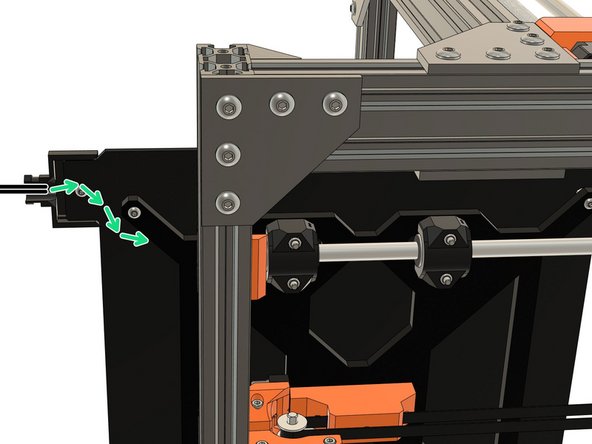
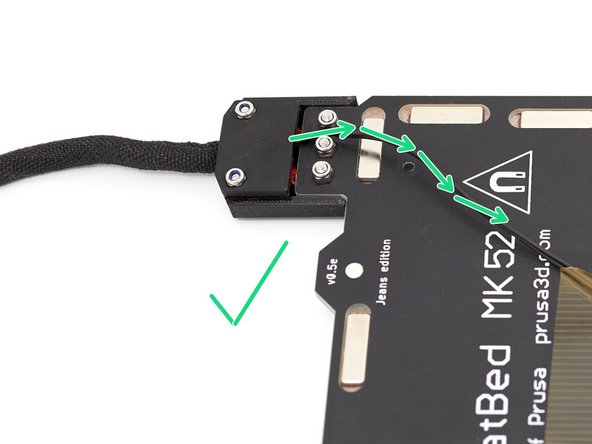
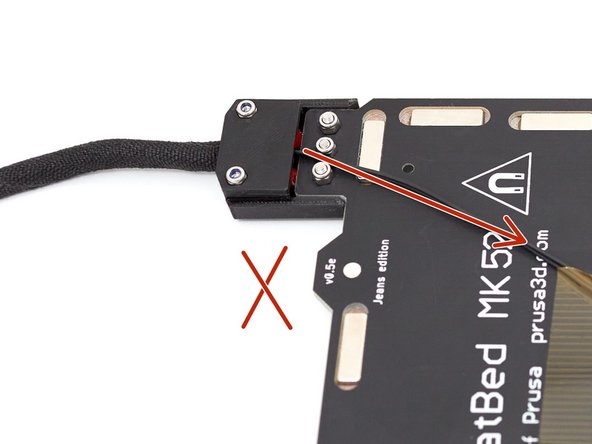
On your heated bed, verify that the thermistor cable is not stretched, it should make a small curve.
-
If the cable is stretched it might move the thermistor from its position or damage the wires during printing.
-
-
-
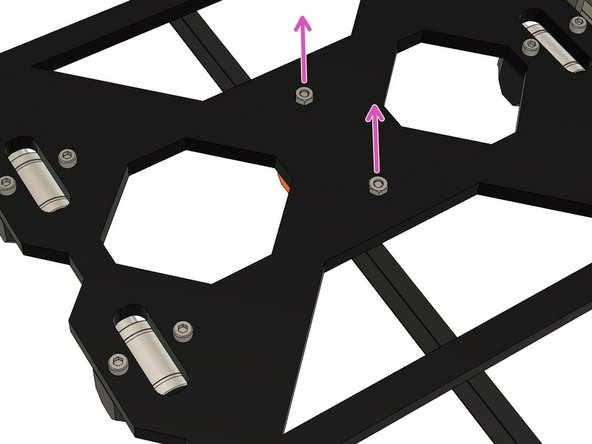
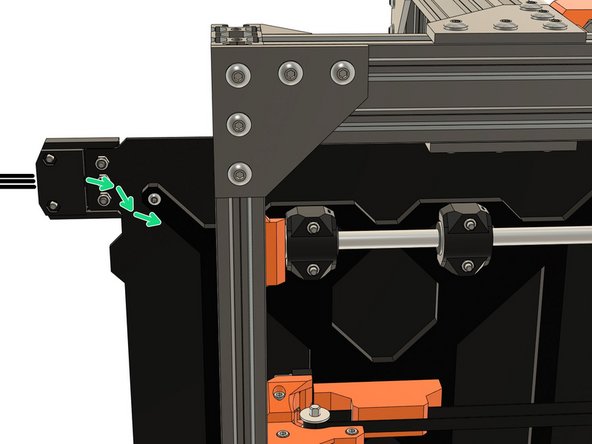
Remove the two temporary hex nuts from the Y carriage and save them for later use. Keep the M3x12 screws of the y_belt_holder in place.
-
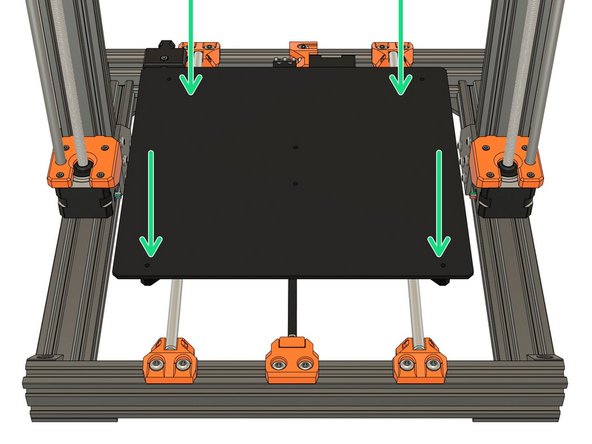
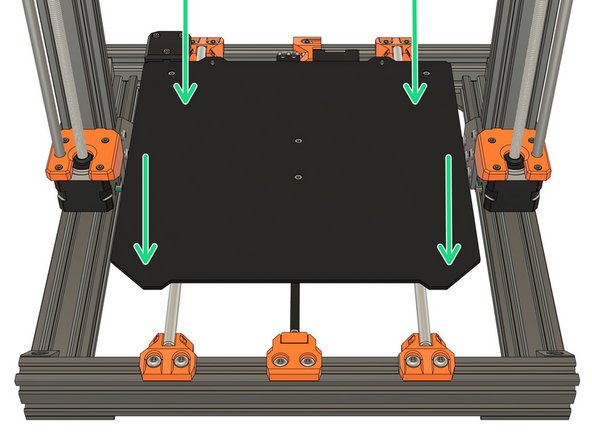
Place the heated bed on the Y carriage.
-
-
-
Be careful with the extruder during this step, it will slide when you rotate the printer to access screws under the heated bed.
-
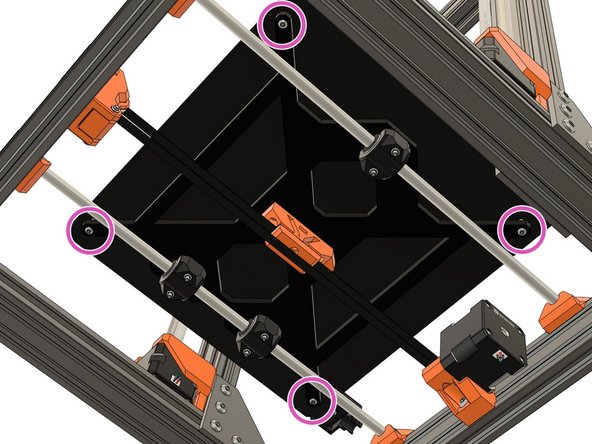
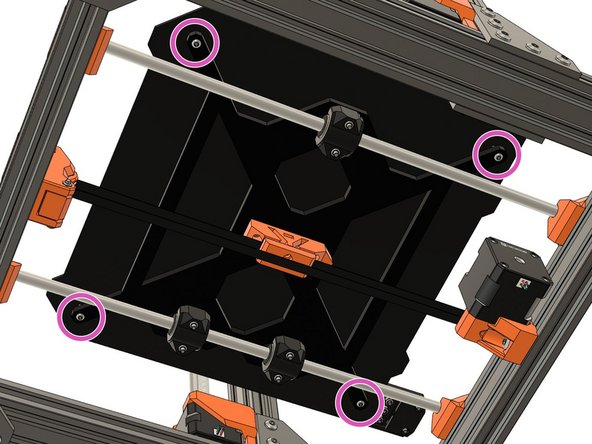
Take 4x M3x8 button head screws (reused from your Original Prusa) and secure the heated bed in the corners. Do not fully tighten the screws yet.
-
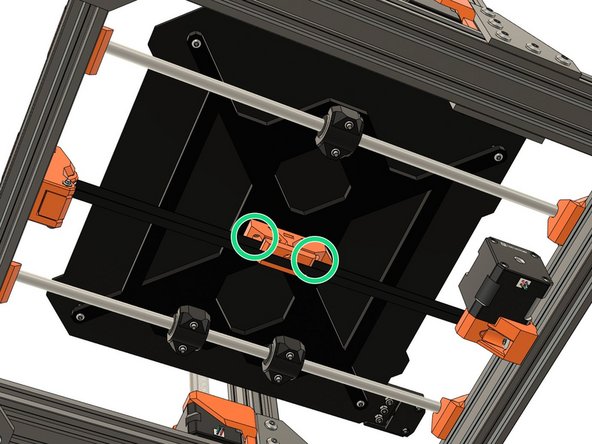
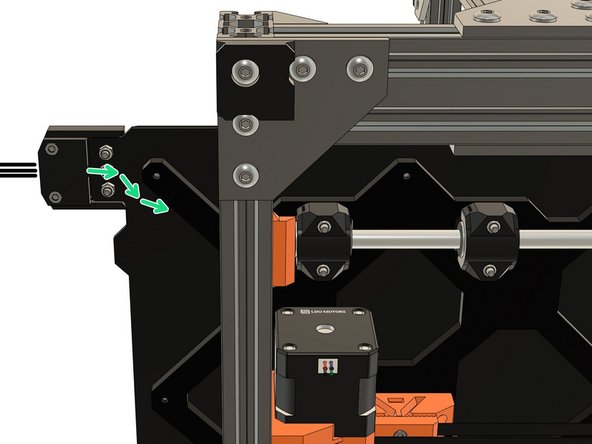
Using the 2x M3x12 screws, secure the y_belt_holder to the bed. Do not fully tighten the screws yet.
-
Fully tighten all the screws evenly, incrementally and in turn, in this precise orders (do not use excessive force or you might break the spacers):
-
1st the screws of y_belt_holder.
-
2nd one of the corner in diagonal.
-
3rd the other corner in diagonal.
-
Repeat until all screws are fully tightened.
-
-
-
Verify again, that the thermistor cable is not stretched (it should make a small curve) and does not sag down too much as it could be damaged with bed movements.
-
-
-
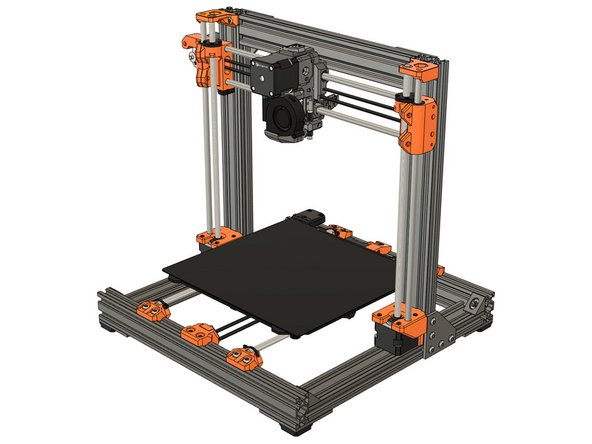
Congratulations you have finished this chapter :)
-
Go to the next chapter: 08. LCD screen and PSU.
-
-
-
On your heated bed, verify that the thermistor cable is not stretched, it should make a small curve.
-
If the cable is stretched it might move the thermistor from its position or damage the wires during printing.
-
-
-
Remove the two temporary hex nuts from the Y carriage. Keep the M3x12 screws of the y_belt_holder in place.
-
Place the heated bed on the Y carriage.
-
-
-
Be careful with the extruder during this step, it will slide when you rotate the printer to access screws under the heated bed.
-
Take 4x M3x8 button head screws (reused from your Original Prusa) and secure the heated bed in the corners. Do not fully tighten the screws yet.
-
Using the 2x M3x12 screws, secure the y_belt_holder to the bed. Do not fully tighten the screws yet.
-
Fully tighten all the screws evenly, incrementally and in turn, in this precise orders (do not use excessive force or you might break the spacers):
-
1st the screws of y_belt_holder.
-
2nd one of the corner in diagonal.
-
3rd the other corner in diagonal.
-
Repeat until all screws are fully tightened.
-
-
-
Verify again, that the thermistor cable is not stretched (it should make a small curve) and does not sag down too much as it could be damaged with bed movements.
-
-
-
Congratulations you have finished this chapter :)
-
Go to the next chapter: 08. LCD screen and PSU.
-
-
-
-
On your heated bed, verify that the thermistor cable is not stretched, it should make a small curve.
-
If the cable is stretched it might move the thermistor from its position or damage the wires during printing.
-
-
-
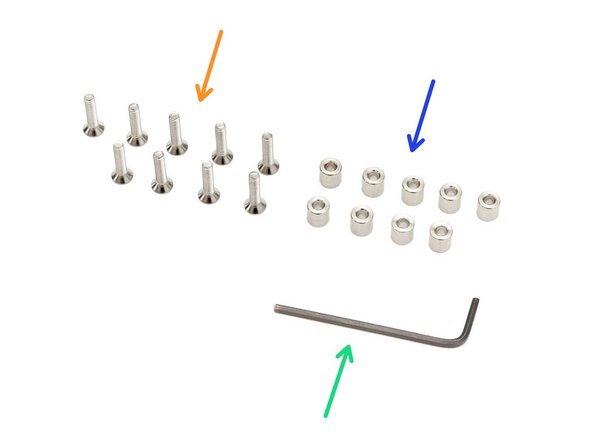
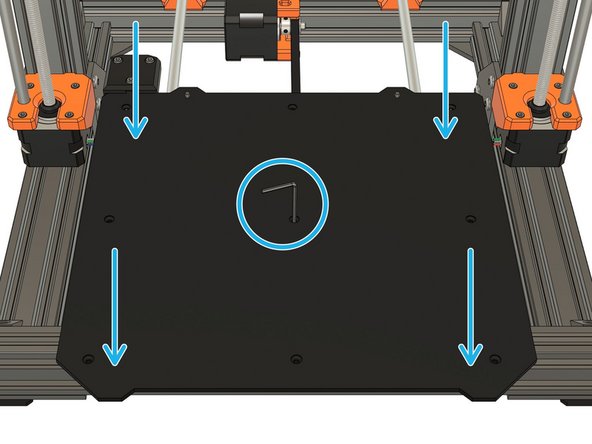
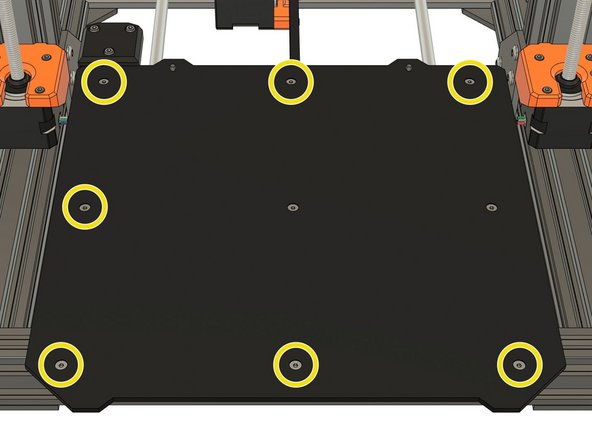
Prepare the following hardware:
-
9x M3x12 or M3x14 flat head screws (reused from your Original Prusa).
-
9x spacers 5.5x6x3 (reused from your Original Prusa).
-
1x 2mm Allen key.
-
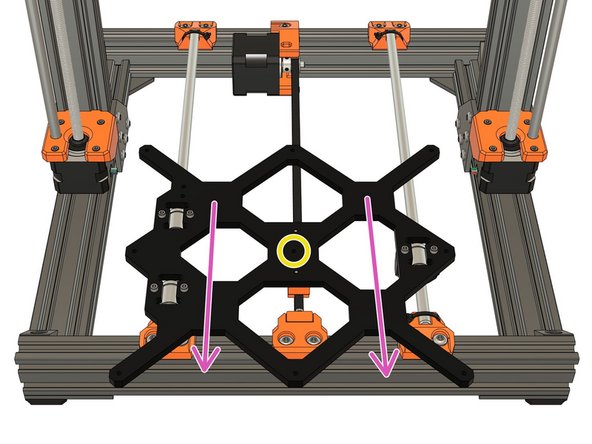
Move the Y carriage to the front.
-
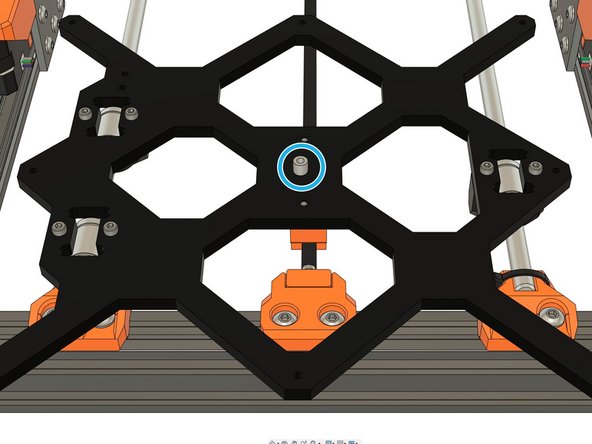
Locate the center hole of the Y carriage.
-
Place 1x spacer on the hole of the Y carriage.
-
-
-
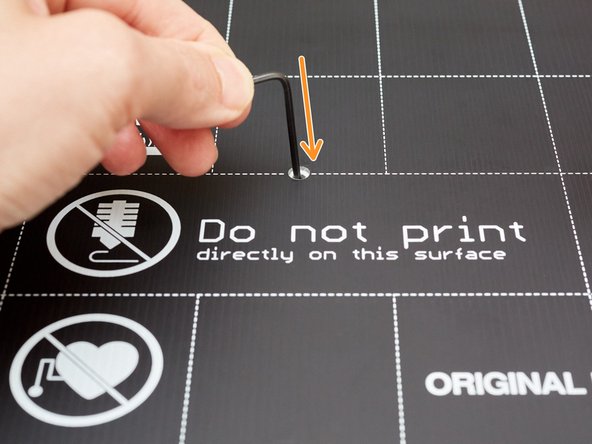
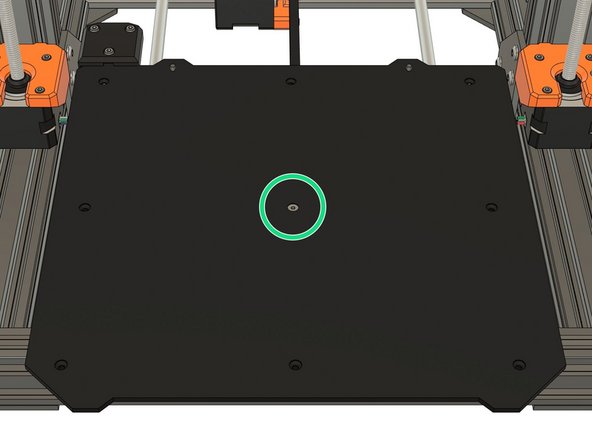
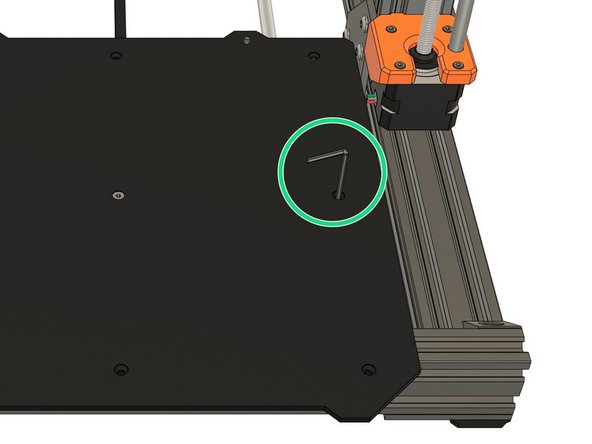
Take your heated bed and insert the hex key in the centeral hole.
-
Place the heated bed with the hex key on the Y carriage. Align the bed with the spacer and the centeral hole of the Y carriage using the hex key.
-
Add one of the M3 flat head screws and secure the bed in the centre. Do not fully tighten the screw yet.
-
-
-
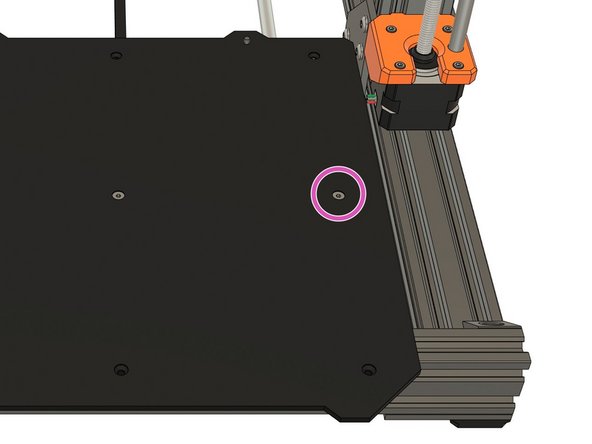
From the right of the bed (or left if you are left-handed), insert a second spacer between the Y carriage and the heated bed. Use needle nosed pliers to make the insertion easier.
-
Use the 2mm hex key to align the spacer.
-
Secure the bed and spacer using one of the M3 flat head screws. Do not tighten fully yet.
-
-
-
Continue with the 7 other points of the heated bed.
-
Make sure no screw is fully tightened or you may warp the heated bed.
-
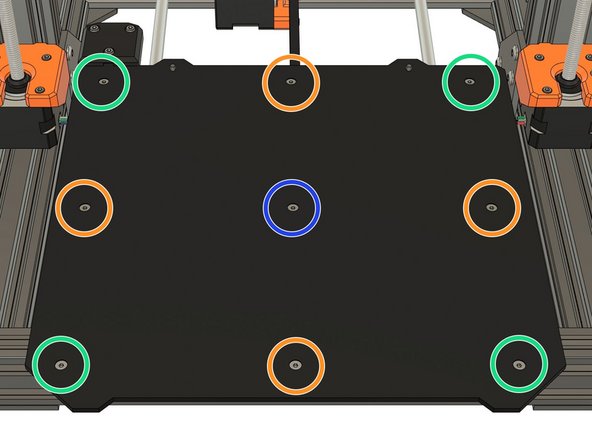
Fully tighten the M3 flat head screws evenly and incrementally in this precise order:
-
1st center screw.
-
2nd corner screws.
-
3rd side screws.
-
Repeat until all screws are fully tightened.
-
-
-
Verify again that the thermistor cable is not stretched (it should make a small curve) and does not sag down too much as it could be damaged with bed movements.
-
-
-
Congratulations you have finished this chapter :)
-
Go to the next chapter: 08. LCD screen and PSU.
-


Cancel: I did not complete this guide.
27 other people completed this guide.
