-
-
Inserting Hex Nuts: To assure that hex nuts are properly seated, do the following:
-
Insert a screw through a washer.
-
Insert the screw through the hole on the flat side (not the hex cavity side).
-
Add the hex nut on the screw and tighten the screw.
-
Ensure the hex nut is aligned with the hex cavity while tightening.
-
When the nut is fully seated, you need to remove the screw being careful not to dislodge the nut.
-
Inserting Nyloc Nuts: You can use the same method as hex nuts.
-
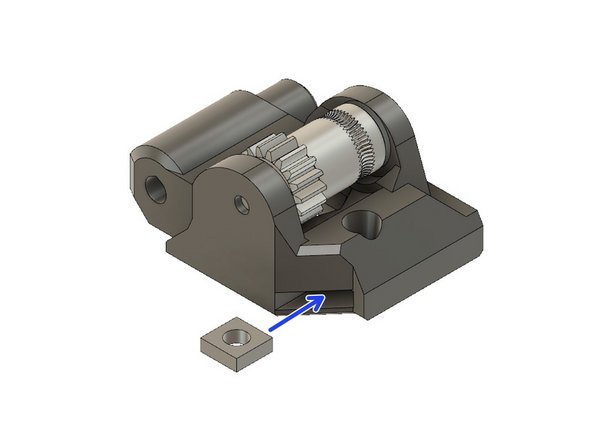
Inserting Square Nuts: They tend to fall out if the piece holding them is inverted. After they are inserted, check that they are properly seated by inserting a screw to engage that nut.
-
-
-
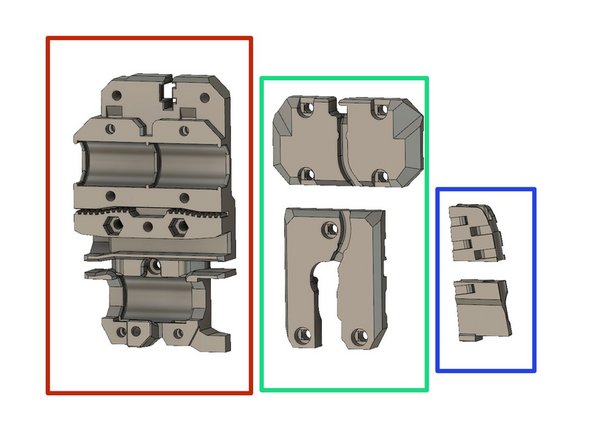
extruder_body
-
extruder_cover
-
extruder_idler
-
pinda_mount
-
hotend_collet_clip
-
filament_sensor_cover
-
-
-
x_carriage
-
x_carriage_back
-
cable_guide_back (part A and B)
-
-
-
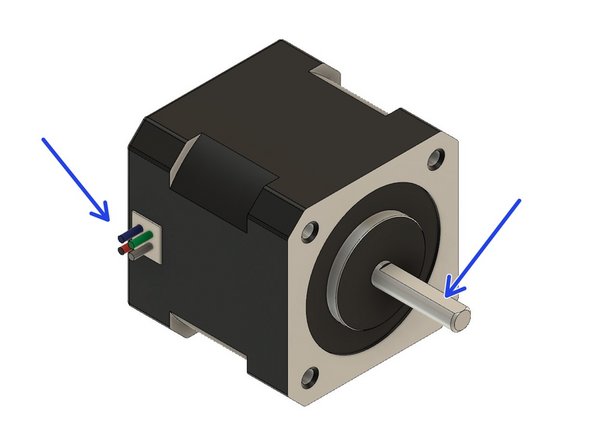
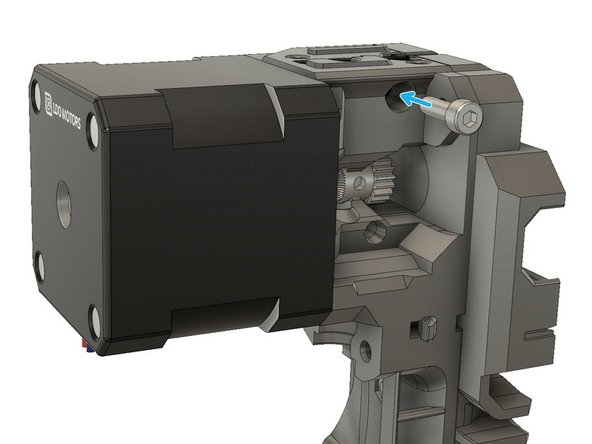
Locate the extruder motor so the wires face to the left. Rotate the shaft so that the flat is facing up.
-
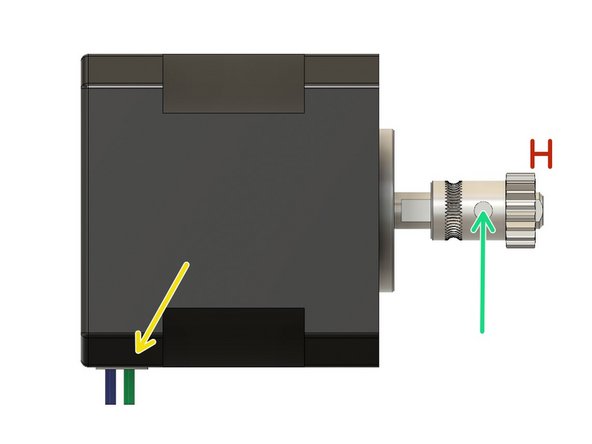
Mount the Bondtech pulley on the extruder motor shaft with the toothed portion on top with the set screw contacting the flat portion of the shaft.
-
The motor shaft should protrude by approximately 1mm.
-
Secure the set screw to avoid the gear moving. We will fine tune the position later.
-
Verify the motor cables orientation.
-
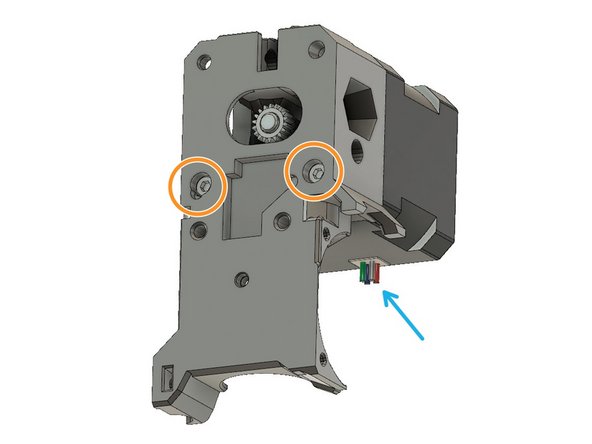
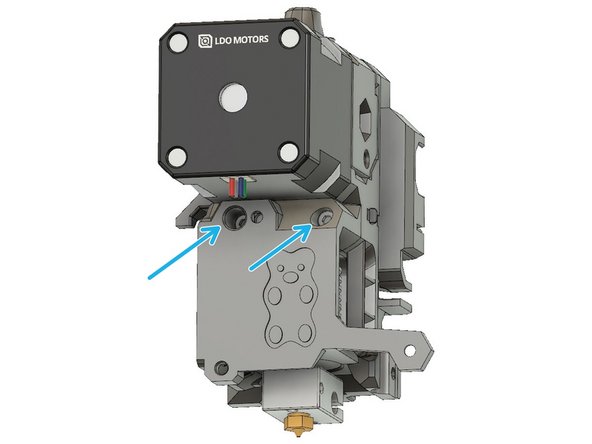
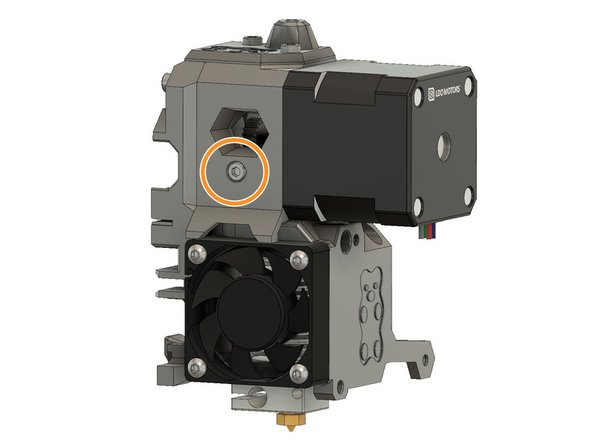
Secure the extruder motor to the extruder_body using two M3x25 screws.
-
Verify the motor cables orientation
-
-
-
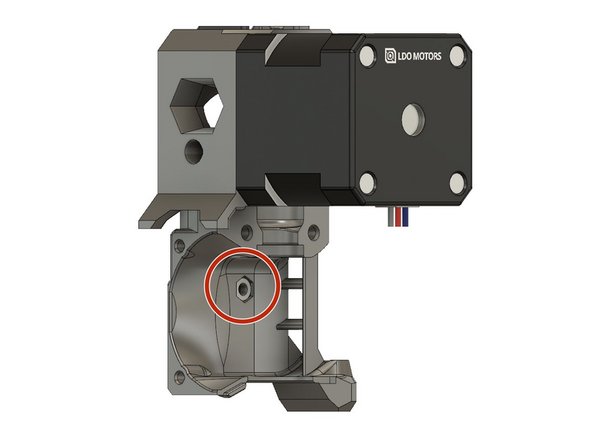
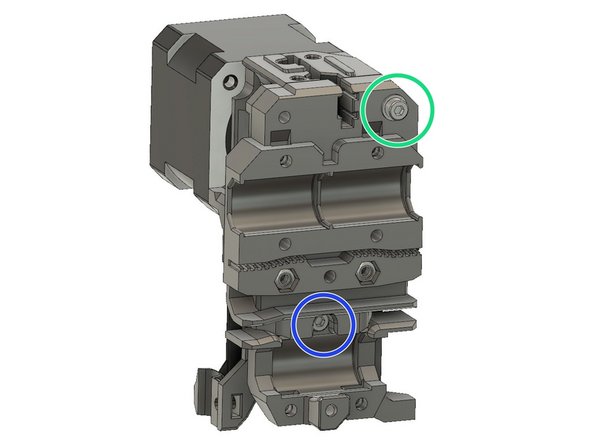
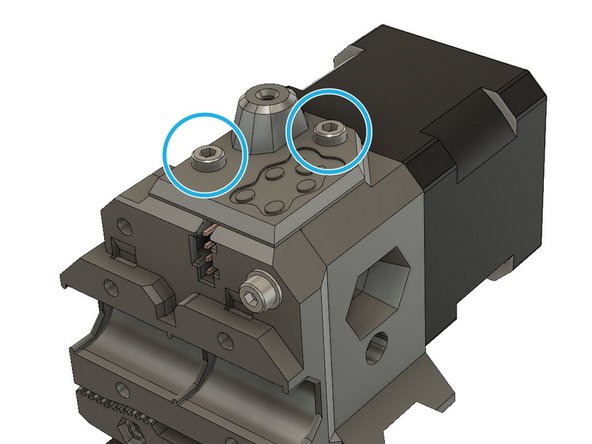
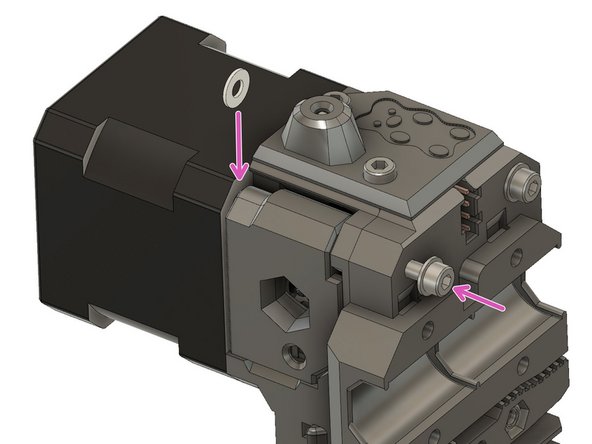
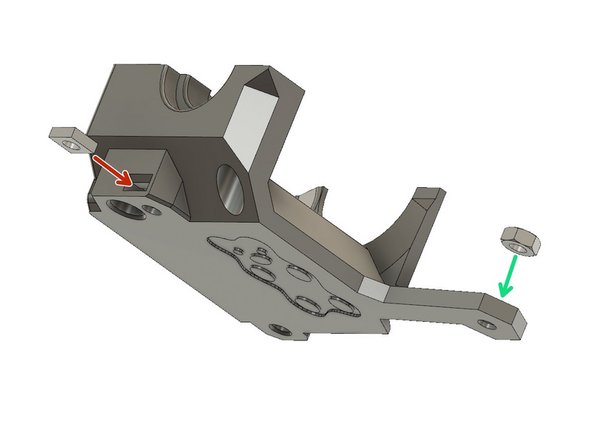
Press an M3 hex nut into the extruder_body.
-
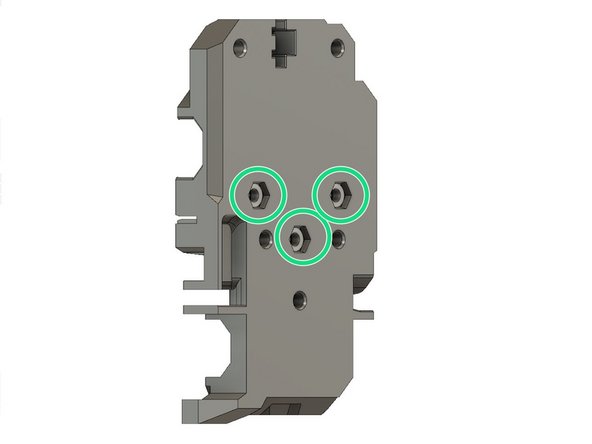
Insert three M3 hex nuts
-
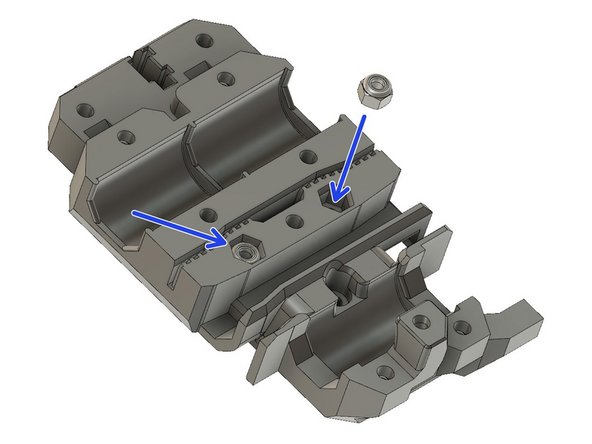
Insert two M3 nylock hex nuts
-
-
-
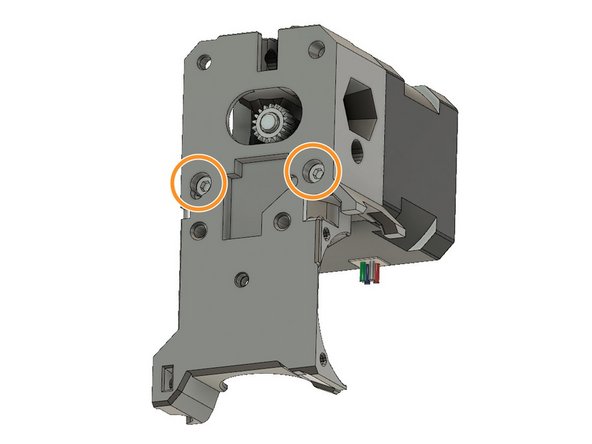
Verify that the M3x25mm screws are snug
-
Using an M3x10 screw attach the extruder_body to the x_carriage.
-
Using an M3x40 screw and an M3 washer attach the extruder_body to the x_carriage.
-
Verify that extruder_body and x_carriage are correctly aligned. Adjust if necessary with the M3x10 and M3x40 screws
-
-
-
In order to avoid electrostatic discharge to the filament sensor, touch something metallic that is linked to the ground, for example pipework or a faucet.
-
Verify that the laser sensor is clean. If not, use a cotton bud (q-tip) with a dab of Isopropyl alcohol.
-
Insert the filament sensor into the extruder_body. Avoid touching any of the components on the PCB.
-
Using an M3x10 screw, secure the filament sensor.
-
Don't over-tighten the filament sensor to avoid damaging the PCB.
-
-
-
Insert the small PTFE tube in the extruder_body
-
Use two M3x10 screws and the filament_sensor_cover to close the top of the extruder_body
-
-
-
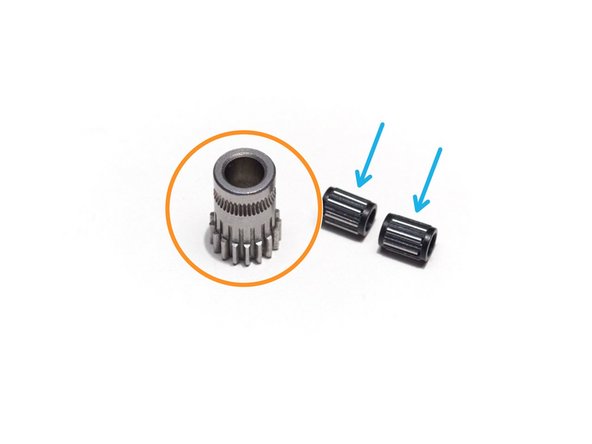
Locate the Bondtech drive gear. This is the one that has NO set screw.
-
Lubricate the needle bearings with a dab of lithium based grease
-
Slide two Bondtech needle bearings in the Bondtech drive gear.
-
-
-
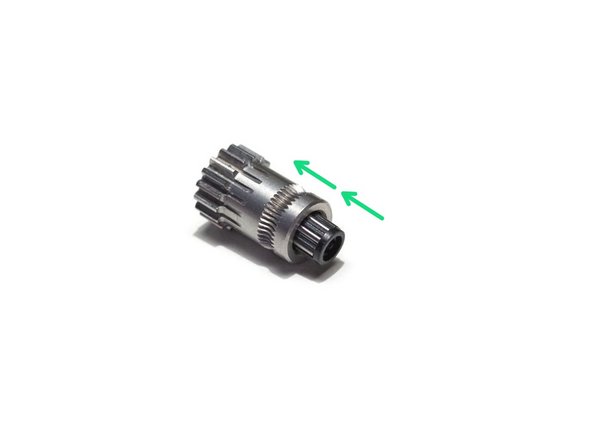
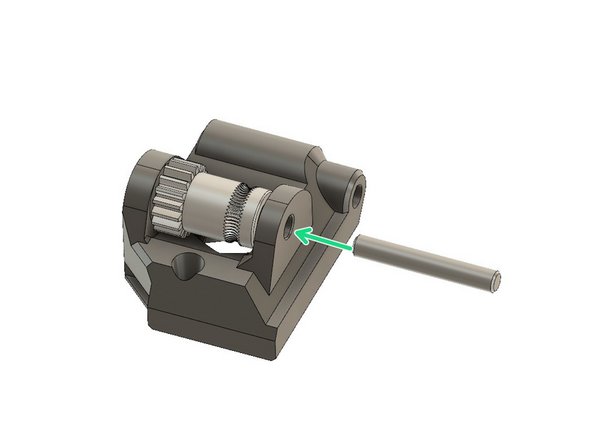
Place the idler gear into the extruder_idler. Note the orientation of the teeth.
-
Make sure that both needle bearings are still present in the idler gear.
-
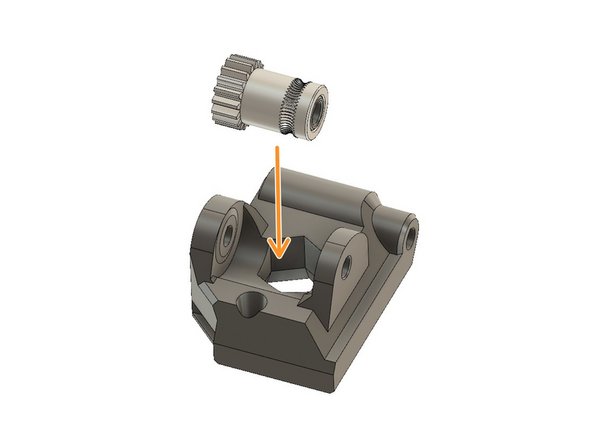
Insert the shaft from the direction as shown in the figure.
-
Insert a square nut in the lateral pocket.
-
Double check the orientation of the gears.
-
Double check that no needle bearings fell out during these steps
-
-
-
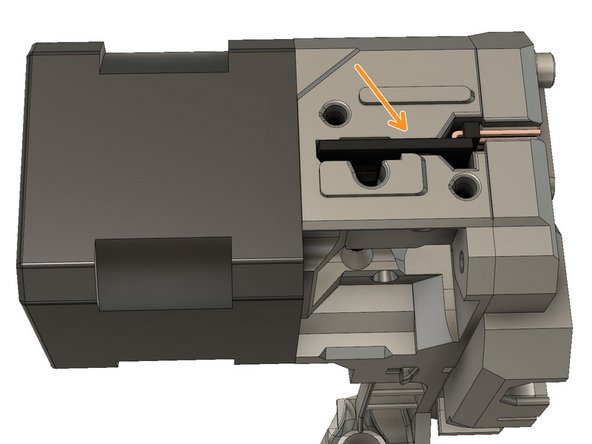
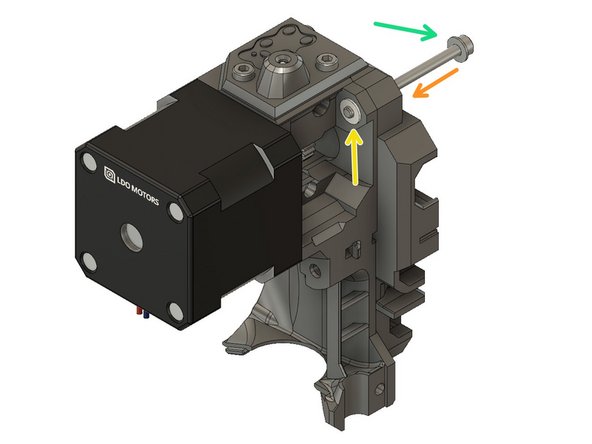
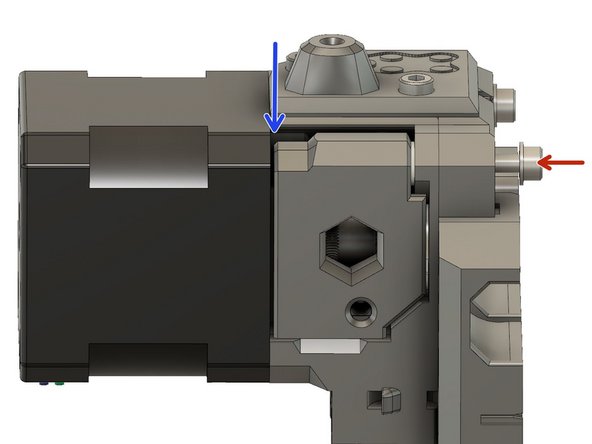
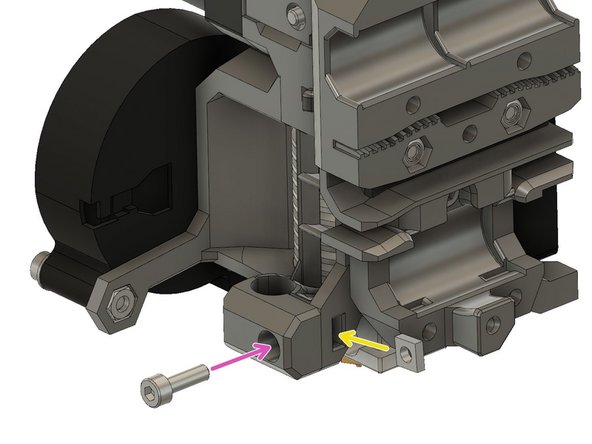
Slide a M3 washer on a M3x40 screw.
-
Insert the screw in the top left hole of the x_carriage until it is just protruding from the other side of the extruder_body.
-
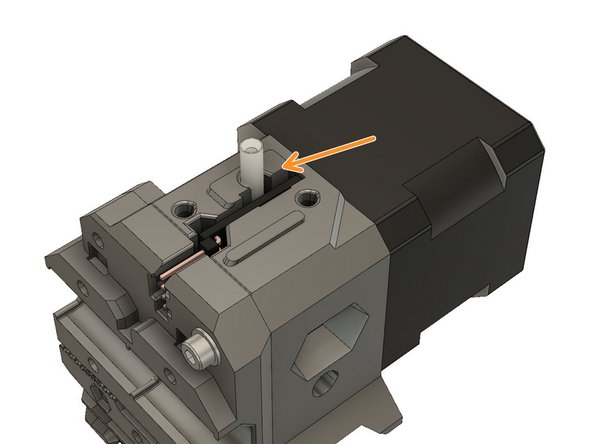
Add a M3 nylon washer on the end of the screw.
-
Add the extruder_idler in the opening. and push the screw.
-
Leave a space to insert the second M3 nylon washer.
-
Insert the second M3 nylon washer and push the screw further to secure it.
-
Slightly tighten the screw, ensuring that the extruder_idler can still rotate freely.
-
-
-
Hotend wires are not visible in these images. Use the heatblock to orientate the hotend correctly.
-
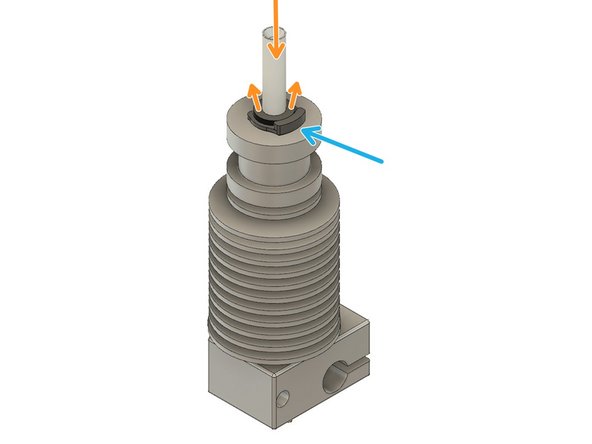
Push down the PTFE tube while raising up the collet.
-
Insert the hotend_collet_clip. This locks the PFTE tube in place.
-
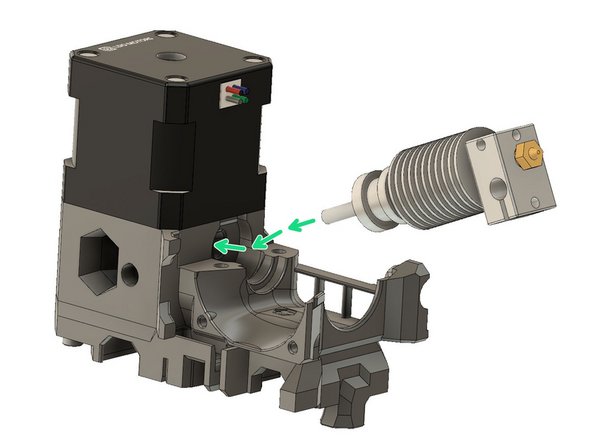
Insert the hot end into the extruder_body so that the heater and thermistor wires are properly oriented.
-
Note the position of the heater and thermistor wires.
-
-
-
Insert one M3 square nut
-
Insert one M3 hex nut
-
Insert one M3 hex nut
-
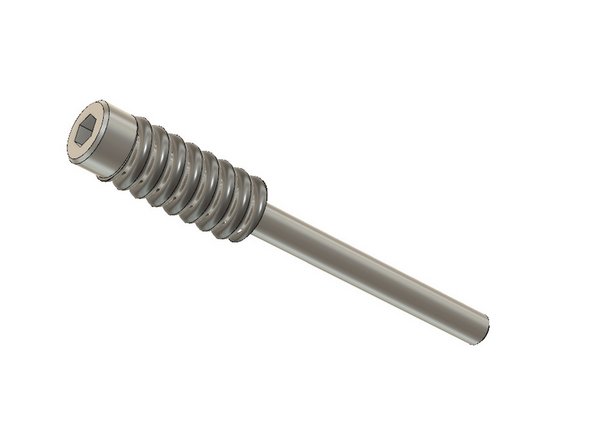
Insert two M3x40 screw to lock the hotend in place
-
Check that the hotend has not rotated, adjust if necessary.
-
-
-
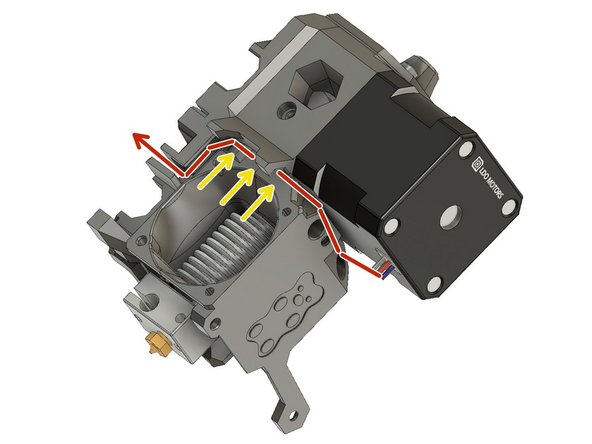
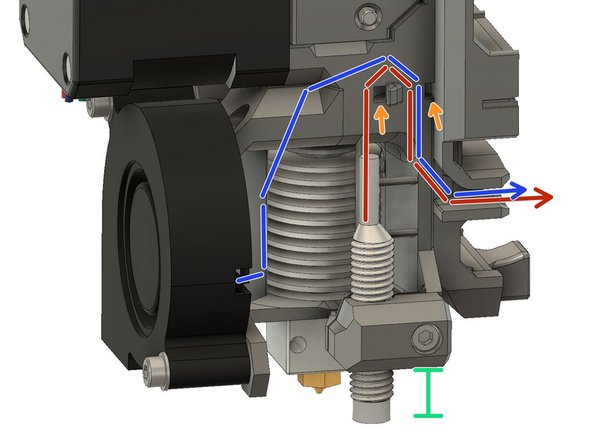
Carefully route the motor wires as shown in the figure.
-
Make sure the wires sit correctly in the channel.
-
This surface will be touching the extruder_body. Wires are going out from this side.
-
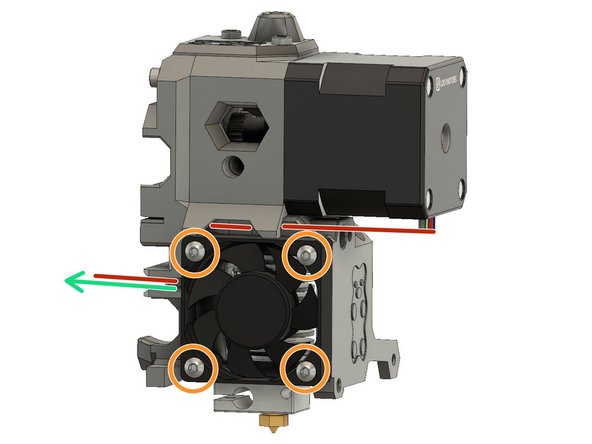
Carefully route the hotend fan wires in the x_carriage.
-
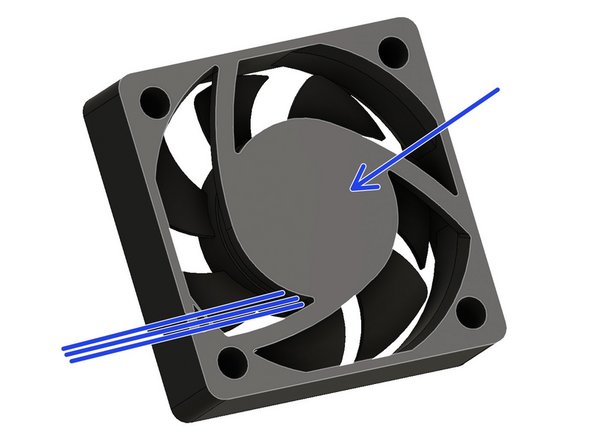
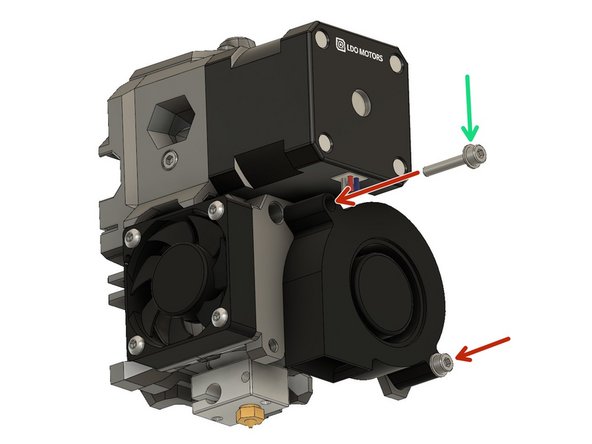
Attach the hotend fan with four M3x14 rounded head screws.
-
Check that no wires are pinched.
-
Check hotend fan orientation.
-
-
-
Open the extruder_idler
-
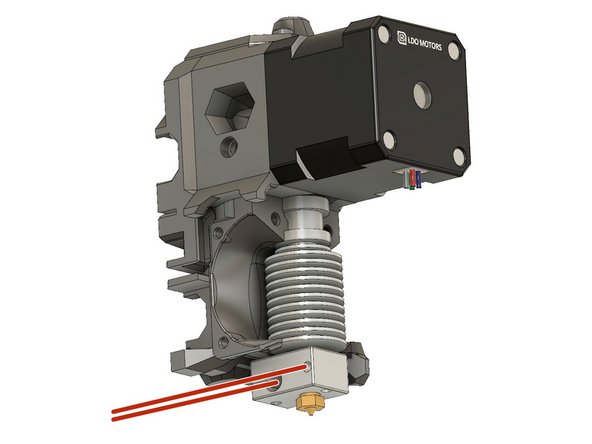
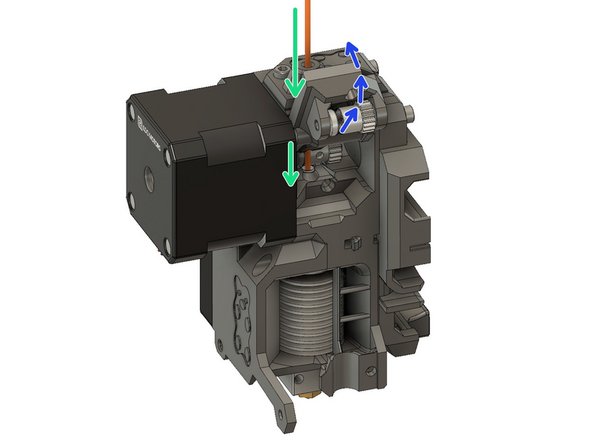
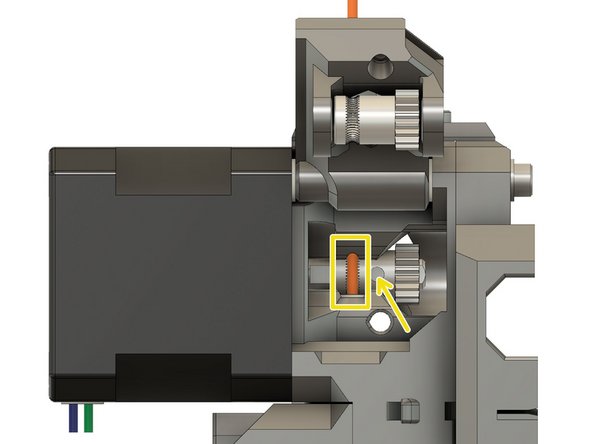
Insert a piece of 1.75 mm filament through the extruder_body into the PFTE tube.
-
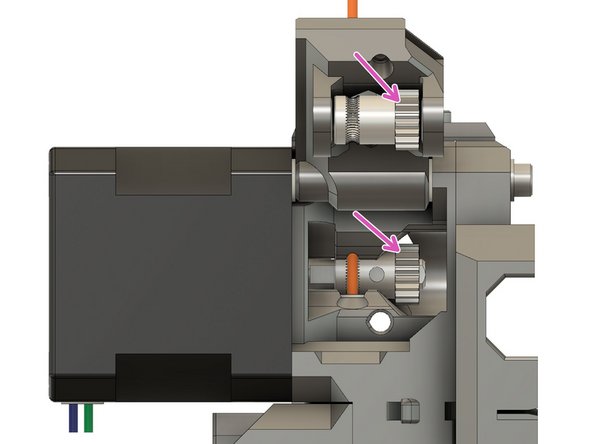
Using the Bondtech set screw, carefully center the filament on the drive teeth.
-
Tighten the set screw. Don't tighten too much as you will damage the thread.
-
Remove the filament.
-
This is a good moment to put a dab of lithium based grease on the gears. Make sure to only put grease on the gears, not the drive teeth!
-
-
-
Make sure you have totally removed the filament from the extruder_body.
-
Slide an extruder spring on a M3x40 screw.
-
Close the extruder_idler door.
-
Slide the screw with the extruder spring in the extruder_body.
-
Tighten the screw in the extruder_idler until the head is flush with the surface of the body.
-
If you have trouble closing the extruder_idler, try rotating the Bondtech idler gear with your finger.
-
-
-
Slide a M3 washer on a M3x18 screw. Do the same for another M3x18 screw.
-
Attach the print fan using the screws
-
Be careful not to over tighten in order to avoid damaging the fan.
-
-
-
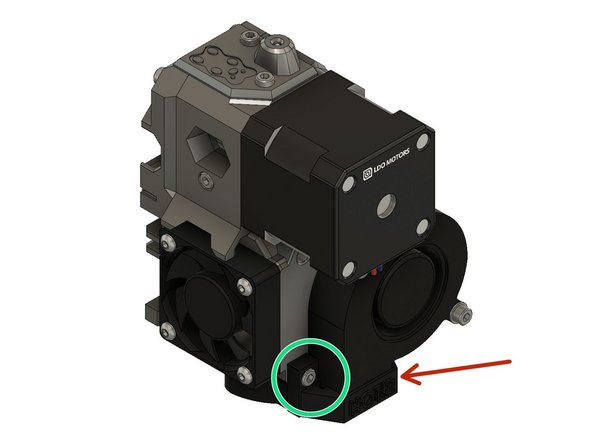
Place a square nut in the extruder_body for the pinda_mount.
-
Slide an M3x10 screw in the pinda_mount and engage the square nut, but do not tighten.
-
Insert the Pinda in the mount so that the sensor end is 12mm below the bottom of the pinda_mount. Tighten the screw just enough to keep the Pinda from falling out. The optimum Pinda position will be adjusted later.
-
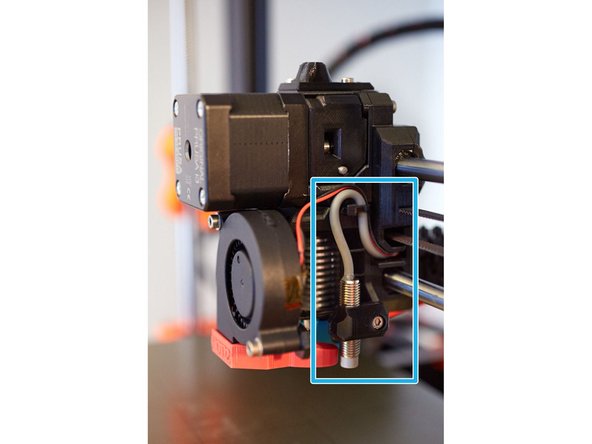
Route the Pinda wires
-
Route the print fan wires
-
Secure the cables with a zip tie. Be sure to leave some slack since the Pinda position will need to be adjusted later.
-
This is an example of how the Pinda and print fan cables should be wired.
-
-
-
There is currently no official print fan shroud for the Bear extruder. I recommend the original R1 shroud from Prusa. Some other good alternatives are the shroud from RH_Dreambox or Robps.
-
Insert the print shroud. If necessary, slightly unscrew the print fan.
-
Use an M3x10 screw to attach the shroud
-
-
-
Congratulations you have finished this chapter :-)
-
Go to the next chapter: 4. Extruder and X axis assembly
-