
-
-
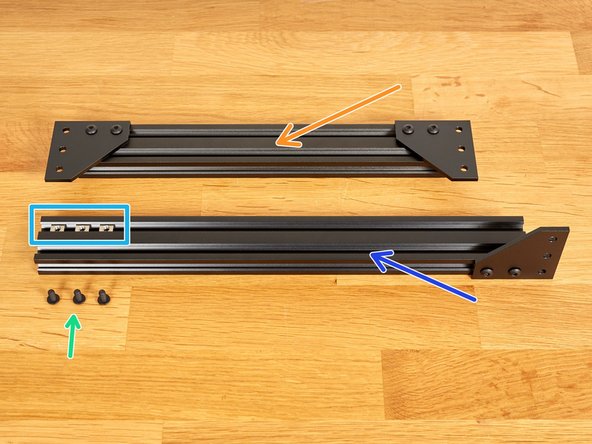
Gather the following hardware:
-
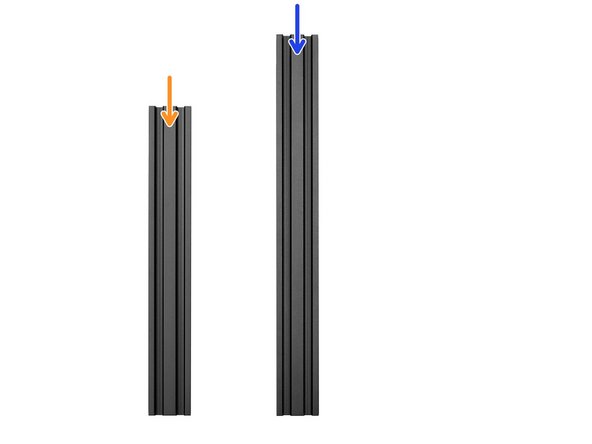
1x 290mm extrusion
-
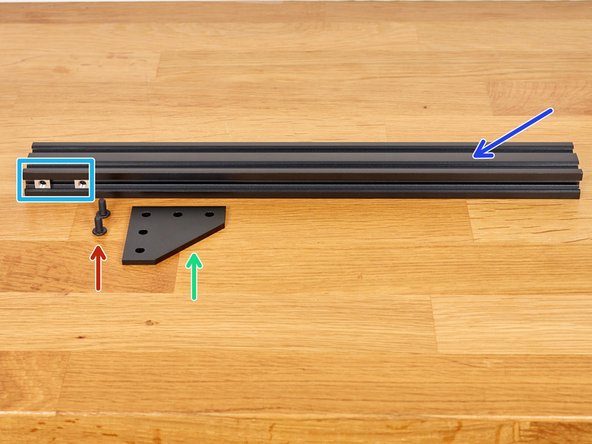
1x 359mm extrusion
-
2x joining plates
-
2x M5x10 screws
-
2x t-nuts. Slide them in one side of the 359mm extrusion as shown in the picture.
-
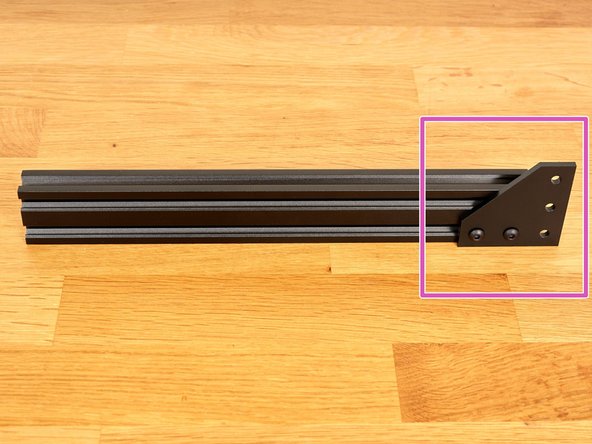
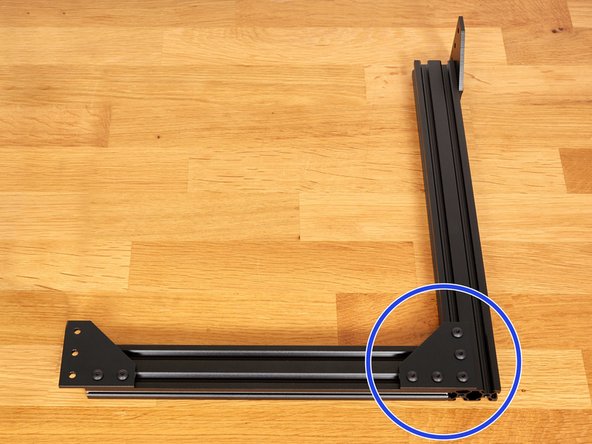
Attach the joining plate, using the 2x M5x10 screws, to the longest extrusion. Do not tighten them fully yet.
-
-
-
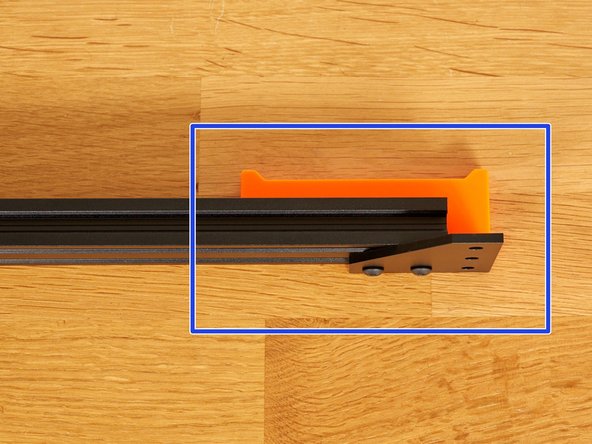
Hold the 290mm extrusion, vertically, against the end of the 359mm extrusion.
-
We use the 290mm extrusion as a spacer to correctly set the position of the joining plate.
-
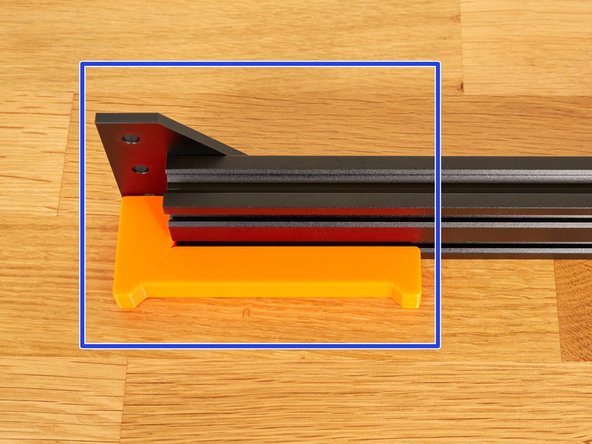
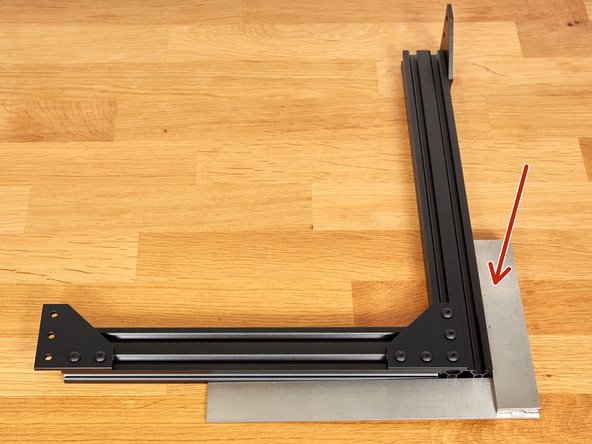
With the help of the second joining plate, hold the plates as shown in the 2nd image. Ensure that the joining plate is flat on the table and flush with the 290mm extrusion before fully tightening the M5 screws.
-
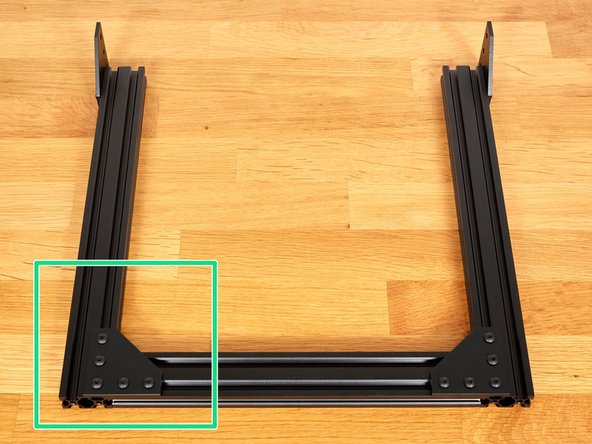
You can now remove the vertical extrusion and verify that the plate is placed like on the 3rd image.
-
-
-
Prepare the following parts:
-
1x 290mm (same extrusion as previously).
-
1x 359mm extrusion.
-
1x joining plates (in addition to the extra one left after the previous step).
-
2x M5x10 screws.
-
2x t-nuts. Slide them in one side of the 359mm extrusion as shown in the picture.
-
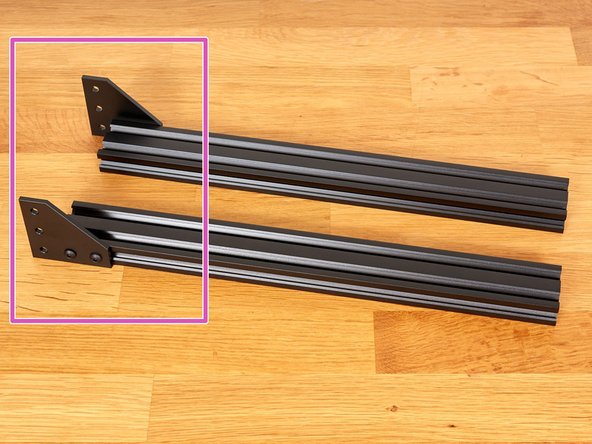
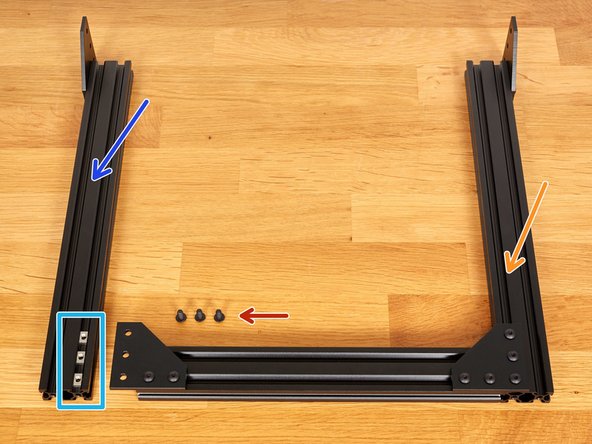
Repeat the previous step to build a 2nd mirrored extrusion + plate assembly.
-
Check that both assemblies are the mirror of each other and that the extrusions are the same length (359mm).
-
-
-
Prepare the following parts:
-
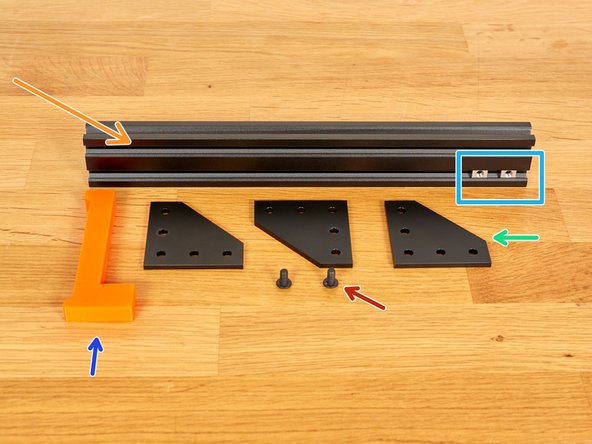
1x 290mm
-
1x build helper Z (build_helper_z.stl)
-
3x joining plates
-
2x M5x10 screws
-
2x t-nuts. Slide them in one side of the 290mm extrusion as shown in the picture.
-
Attach one joining plate using the 2x M5x10 screws to extrusion, as shown. Do not tighten them fully yet.
-
-
-
Place the build_helper_z as shown in 1st and 2nd images.
-
With the help of a joining plate, hold the plates against the extrusion and your table and fully tighten the M5 screws.
-
-
-
Prepare the following parts:
-
1x 359mm extrusion + plate assembly
-
1x 290mm extrusion + plates assembly
-
3x M5x10 screws
-
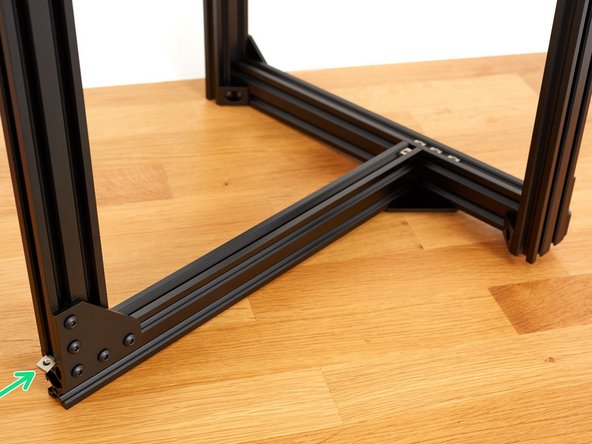
3x t-nuts. Slide them in one side of the 359mm extrusion as shown in the picture.
-
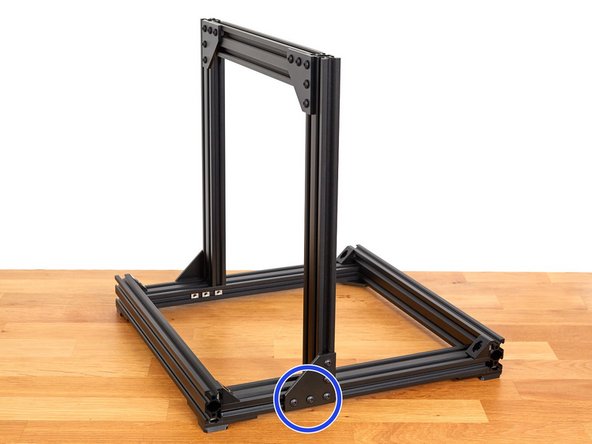
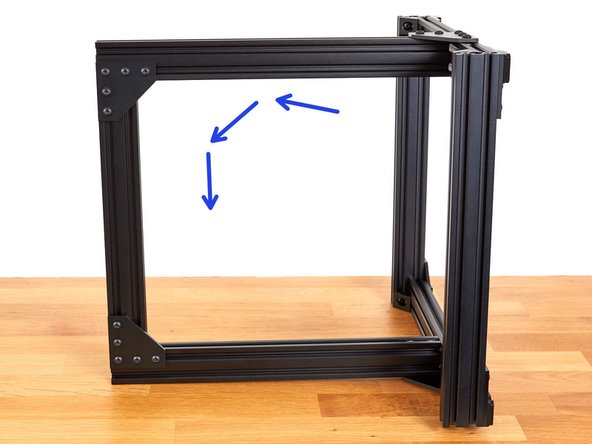
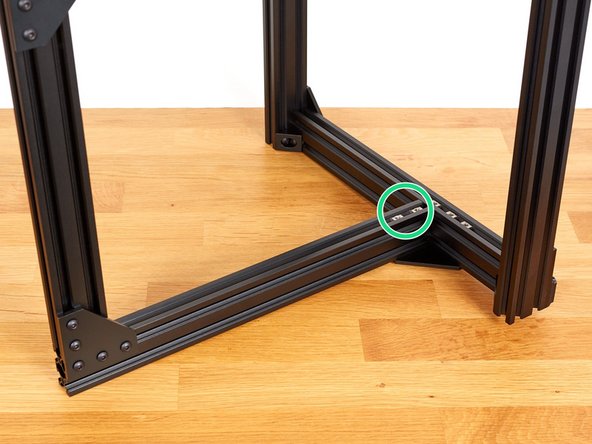
Attach both assemblies together with 3x M5x10 screws. Do not tighten them fully yet.
-
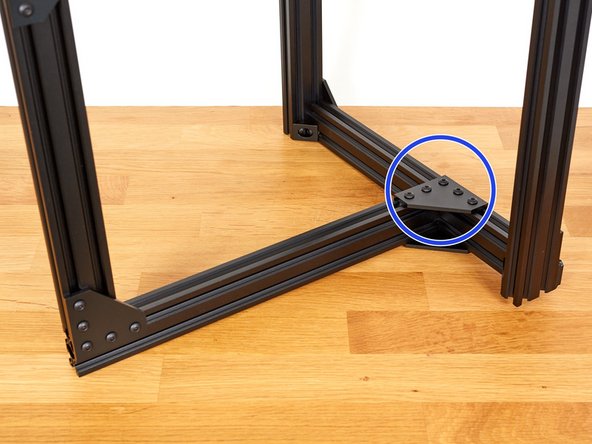
With the help of a square, make sure you have a 90° angle and fully tighten the 3x M5x10 screws.
-
Make sure the plates and extrusions are oriented as shown in the picture!
-
-
-
Prepare the following parts:
-
1x 359mm extrusion + plate assembly
-
1x assembly from the previous step.
-
3x M5x10 screws
-
3x t-nuts. Slide them in the 359mm extrusion as shown in the picture.
-
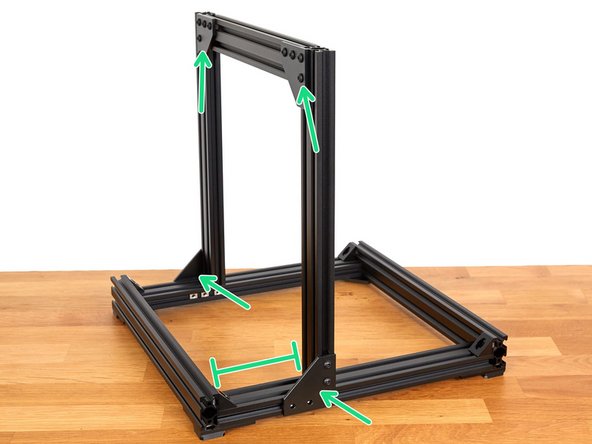
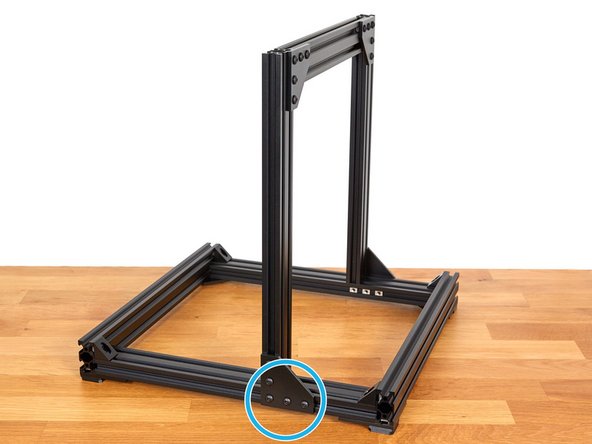
Repeat the instructions from the previous step to form a correctly squared U (Z axis). Make sure it is square and flat.
-
-
-
Double check you have used the correct extrusion lengths:
-
359mm
-
290mm
-
-
-
Prepare the following parts:
-
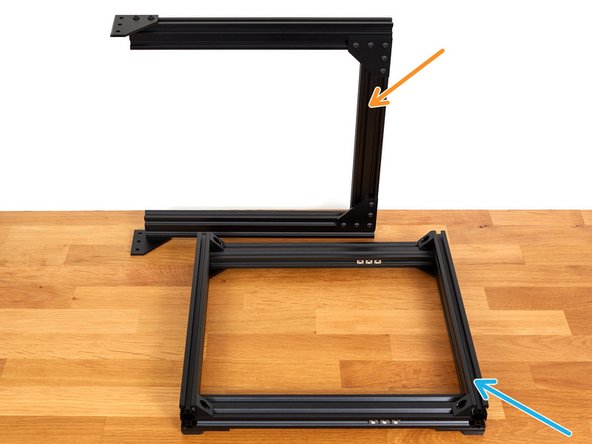
1x Z axis assembled in the previous step.
-
1x Y axis assembled in the previous chapter.
-
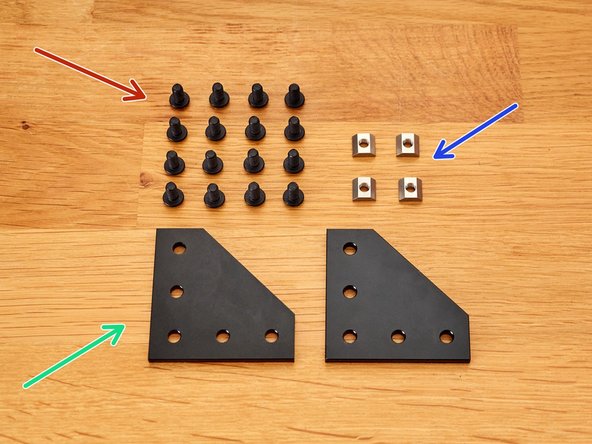
2x joining plates
-
16x M5x10 screws
-
4x t-nuts
-
-
-
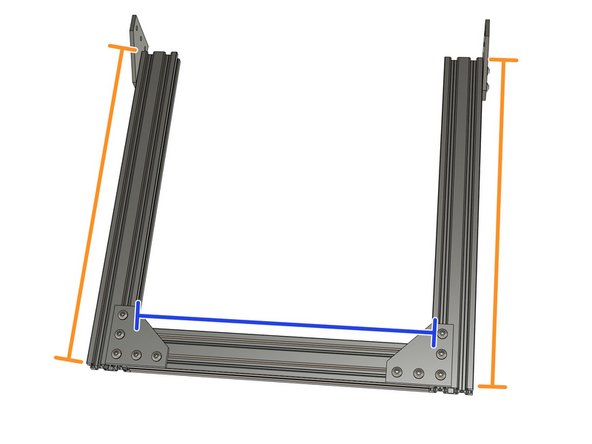
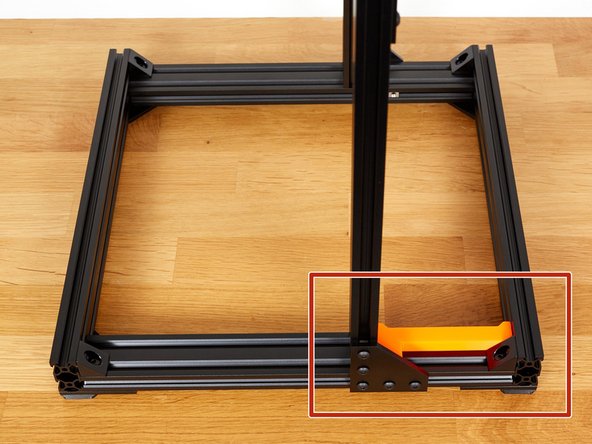
Place the Z axis on the Y axis as shown on the 1st image. Place the Z axis a little closer towards the back of the frame (we will set the correct distance in a later step).
-
Take care to ensure that the Z axis does not fall down!
-
Check the orientation of the Z axis. The joining plates should be pointing towards the back of the frame, as shown.
-
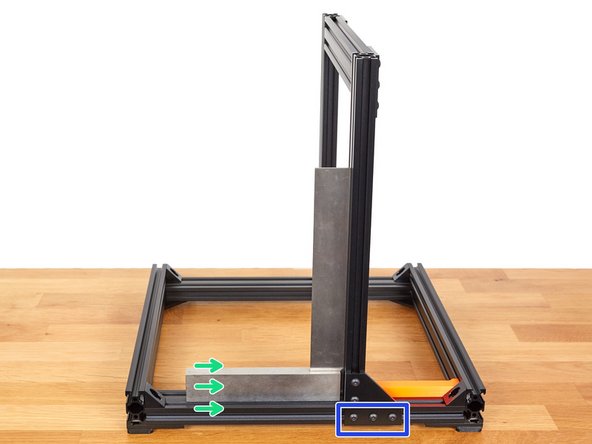
Secure the Z axis with 3x M5x10 screws. Do not fully tighten them yet.
-
-
-
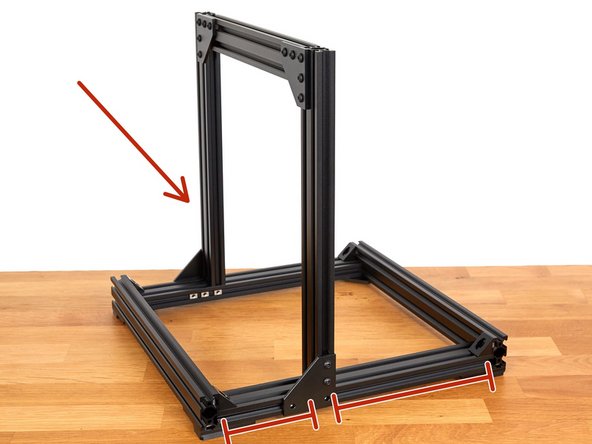
Rotate the frame and secure the other side with 3x M5x10 screws. Do not fully tighten them yet.
-
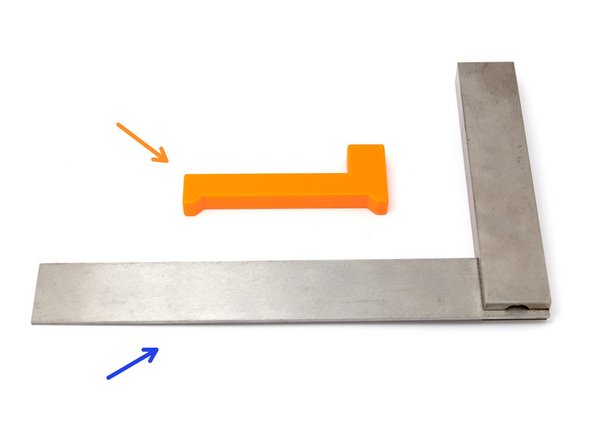
Prepare these tools:
-
build_helper_z
-
Square
-
-
-
Take your time with this step.
-
Use the build_helper_z to set the correct distance, from the back of the frame to the Z axis.
-
Place your square on the Y axis extrusion, as shown, and push in the direction of the build_helper_z.
-
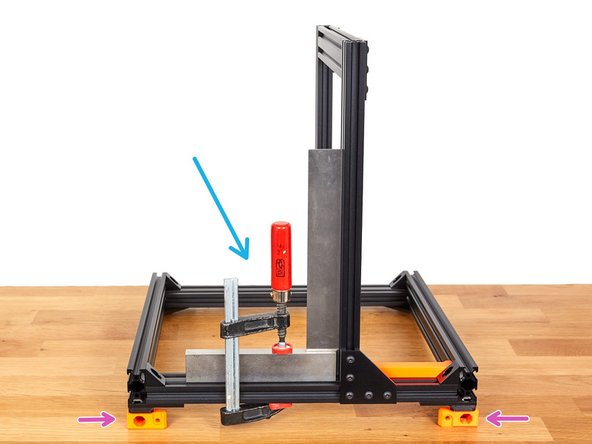
Ensure that the Z axis extrusion is perpendicular to the Y axis and fully tighten the 3x M5x10 screws.
-
This step can be made easier by using a clamp. You can then secure the thicker side of your square to the bottom extrusion as shown in the 3rd image.
-
As your clamp may be too thick to fit under the extrusion, raise the frame on blocks or a plastic part (we used the psu_upper_mount in the photograph).
-
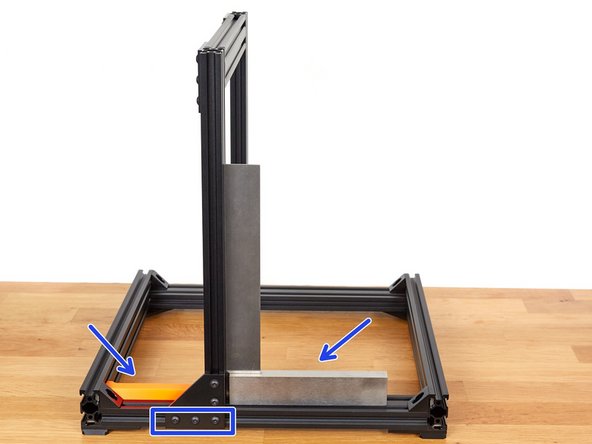
Check that the Z axis is at 90° and adjust if necessary
-
Verify that the plates and extrusions are correctly oriented.
-
-
-
Put the frame on its side.
-
Slide 2x t-nuts in the extrusion, as shown.
-
-
-
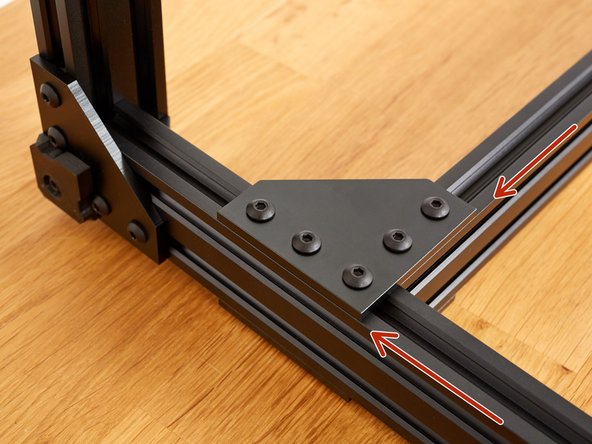
Attach a joining plate with 5x M5x10 screws. Do not tighten them fully yet.
-
Use the build_helper_z to align the plate with the extrusion. Fully tighten the five M5 screws.
-
Verify your plate is correctly aligned with both extrusions.
-
If the plates are not perfectly aligned with the Z axis extrusion it might cause an issue with the Z motor mount later.
-
-
-
Put the frame on its other side.
-
Repeat the previous step on this side
-
Verify your plate is correctly aligned with both extrusions.
-
If the plates are not perfectly aligned with the Z axis extrusion it might cause an issue with the Z motor mount later.
-
-
-
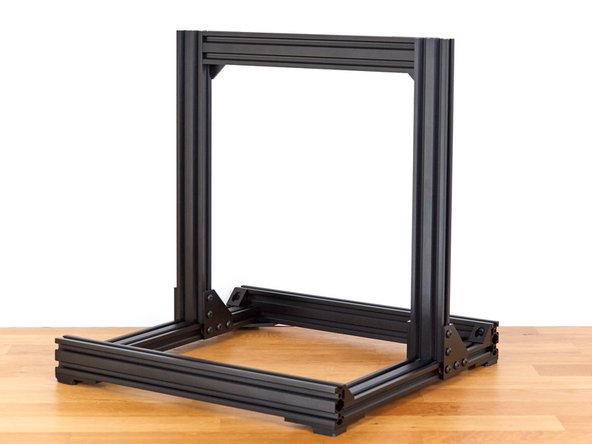
The assembly of the Bear frame is complete. Congratulations! Can you feel the stiffness?
-
Got to the next chapter: 05. Y axis motion
-


Cancel: I did not complete this guide.
52 other people completed this guide.
