
-
-
Orientate the heater block at 135° as shown in the image.
-
Install heater and thermistor as shown in the image.
-
-
-
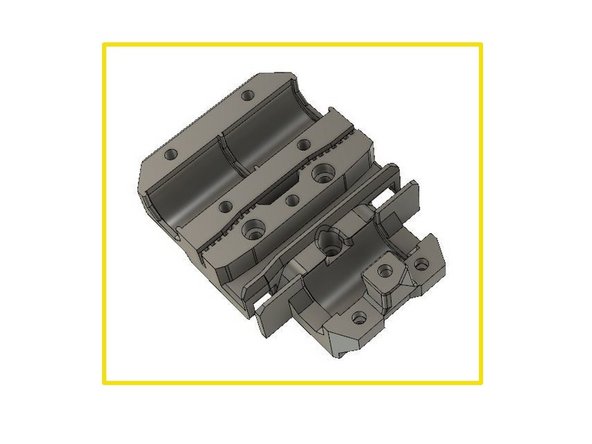
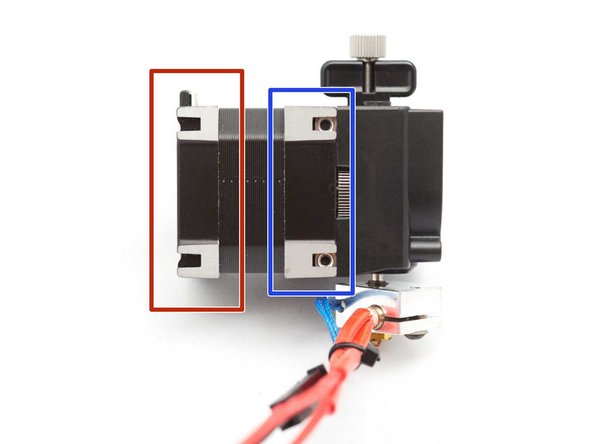
Insert two M3 square nuts in vertical on the back of the stepper
-
Insert two M3 square nuts on top front of stepper
-
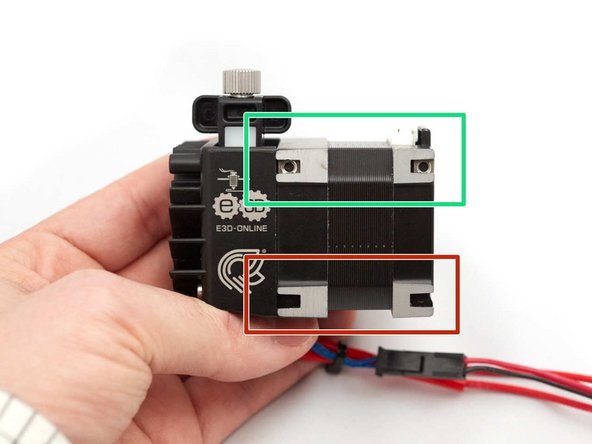
Verify you do not have M3 square nuts in those holes
-
-
-
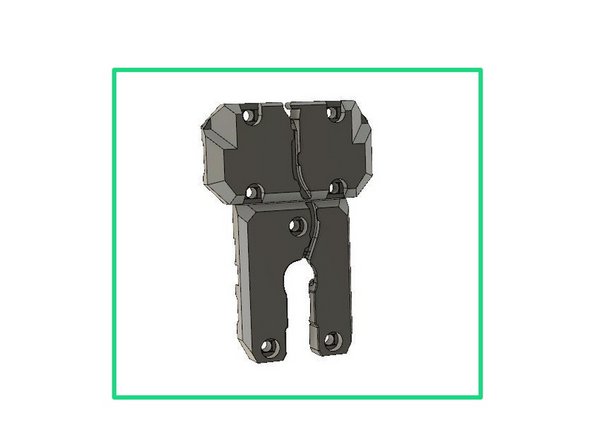
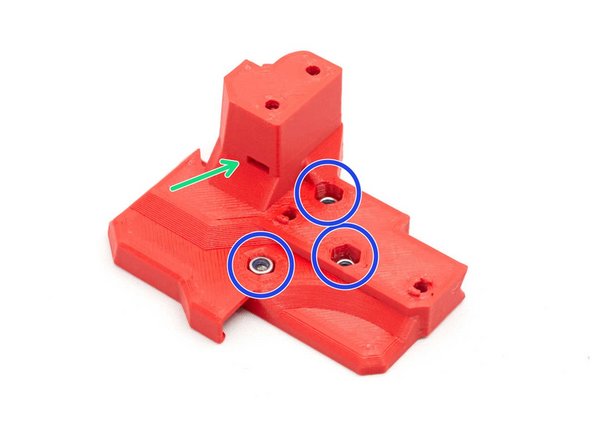
Insert two M3 hex nuts in body_front
-
Insert three M3 nylock nuts in body_back
-
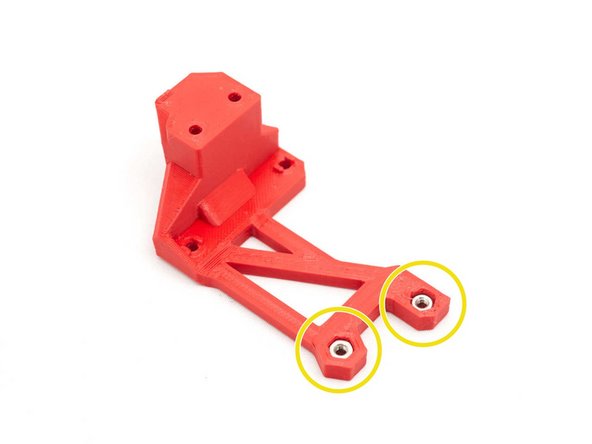
Insert two square nuts in body_back
-
Insert one square nut in body_back
-
-
-
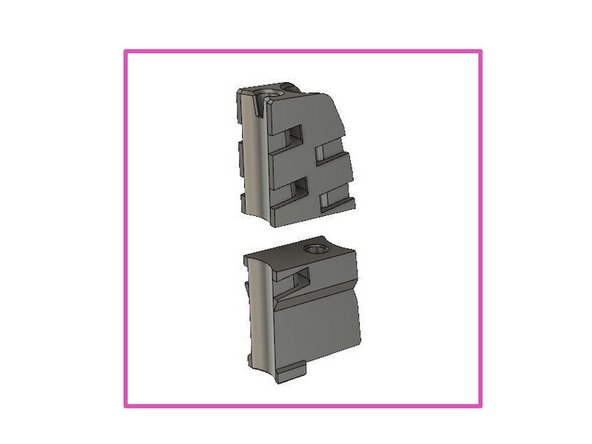
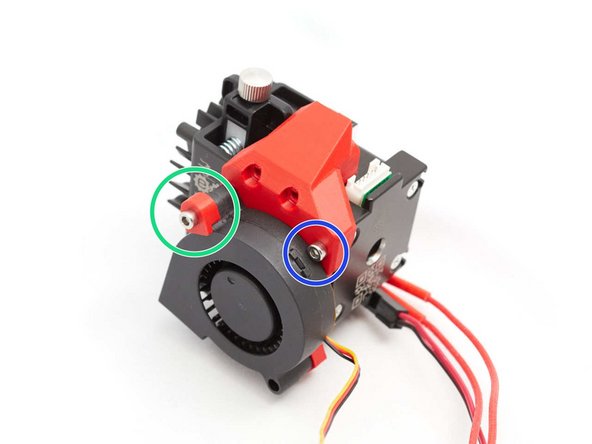
Secure the nozzle fan to the body_front with an M3x25 screw and the printed part nozzle_fan_spacer.
-
Tighten an M3x8 screw
-
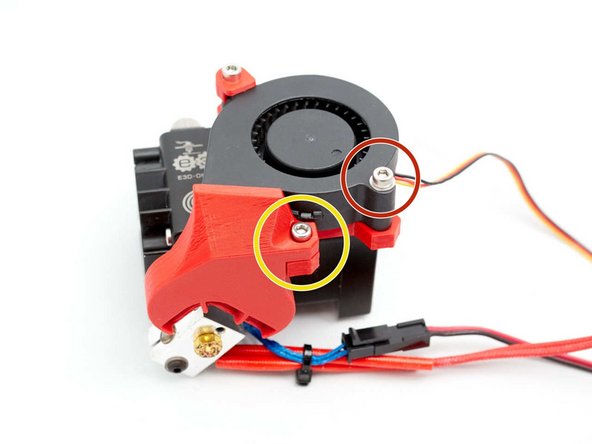
Secure the nozzle_fan_duct with an M3x10 screw
-
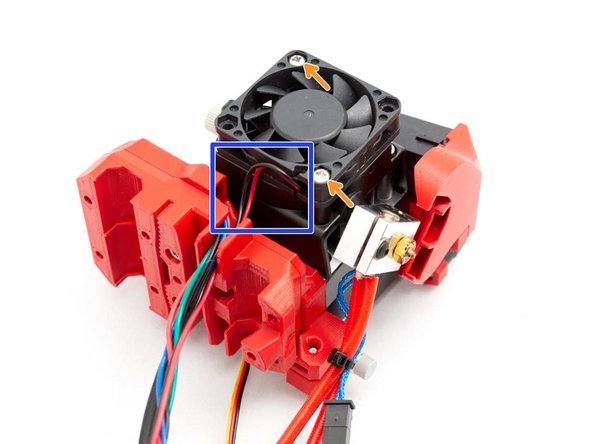
Finish to secure the nozzle fan with an M3x25 screw and a washer
-
To avoid breaking the nozzle fan, make sure you have used the washer as shown in the second picture.
-
-
-
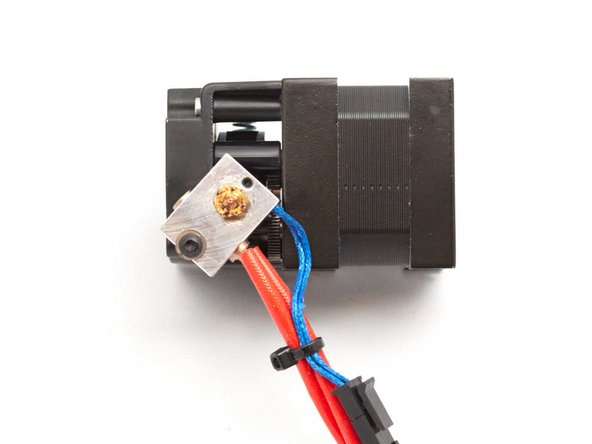
Stepper cable comes with a sleeve you need to remove
-
Assemble body_back with two M3x8 screws. Make sure to not pinch any wires
-
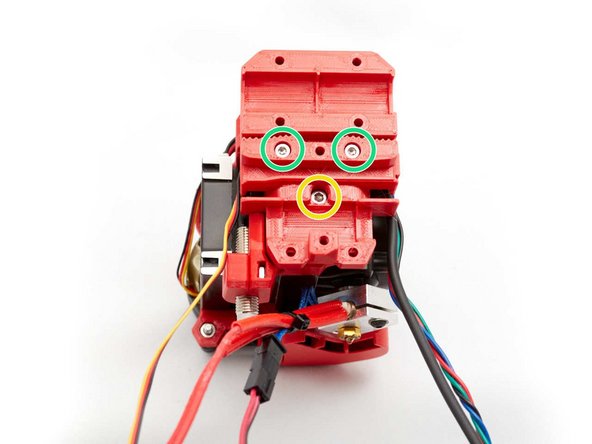
Secure the body_back with two M3x40 screws
-
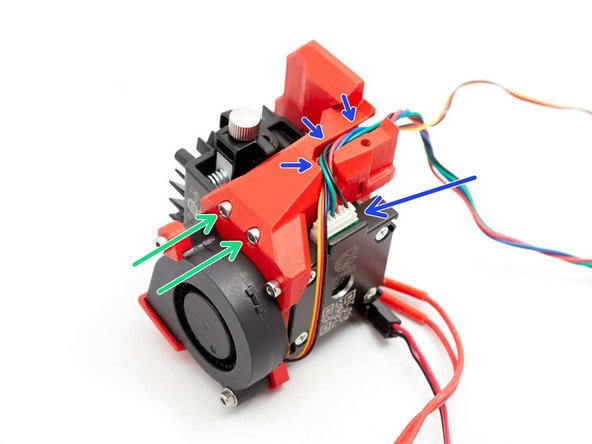
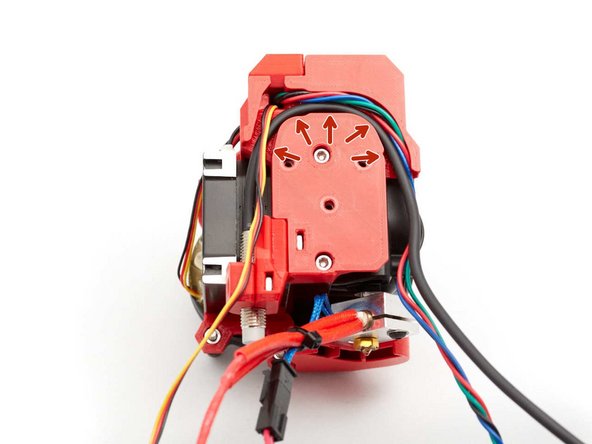
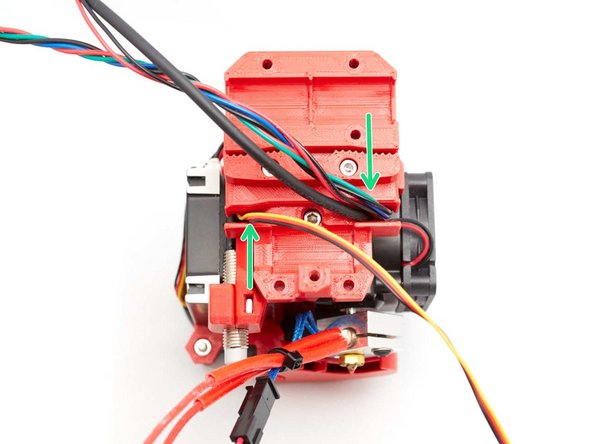
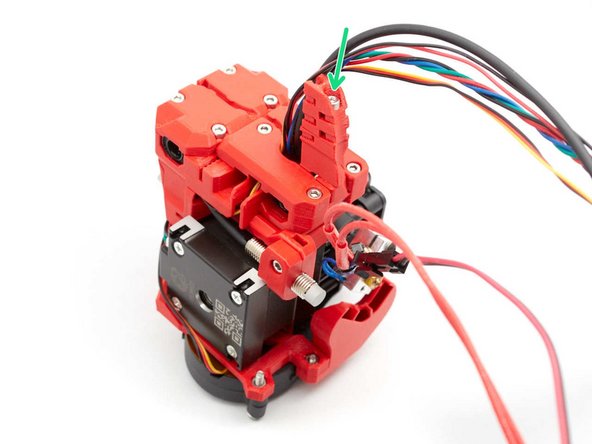
Connect the stepper cable and route them in the top groove with the nozzle fan wires
-
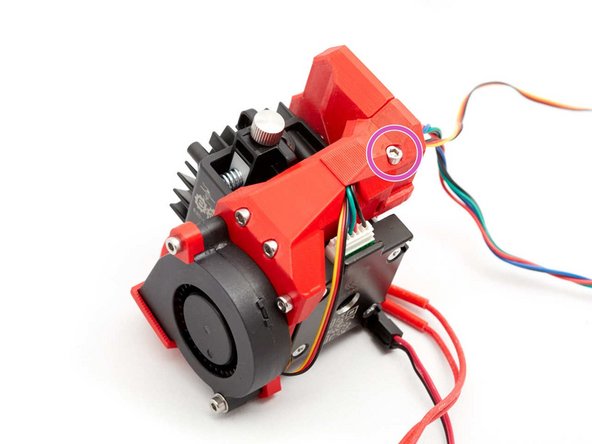
Secure the cables with the cable_cover and an M3x10 screw
-
Verify that no wires are pinched
-
-
-
Insert five M3 hex nuts in the back of the x_carriage
-
Insert an M3 square nut on the back of the pinda_mount
-
Install the pinda_mount on the body_back and secure it with an M3x10 screw
-
-
-
Secure the Pinda on the pinda_mount with an M3x10 screw. The PINDA should be out in the bottom by approx. 10mm
-
Route the stepper motor, nozzle fan and PINDA as shown in the second image. Make sure to not pinch any wires
-
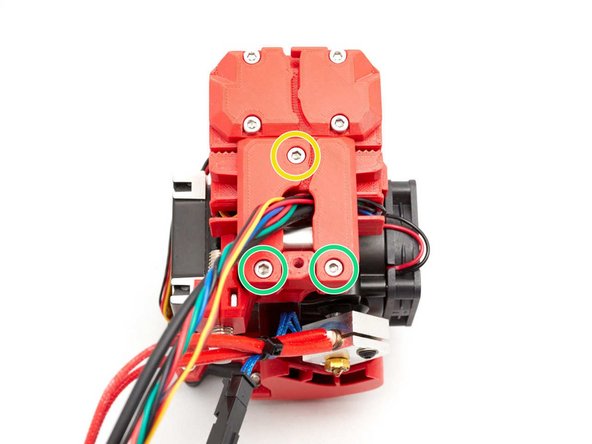
Attach the x_carriage on the body_back with two M3x18 screws
-
And one M3x10
-
Double check you didn't pinch any wires. You should be able to slide them a little if you push/pull on them.
-
-
-
Do not use the Noctua coming with your Prusa printer, it is not strong enough for the Hemera. As of today the E3D fan specs are unknown and so we recommend to use the fan that comes with your Hemera.
-
Attach the Hemera fan with the self tapping screws provided with your Hemera.
-
Create a small loop for the fan wires to reduce tension on the cable
-
Route all wires as shown in the last image
-
-
-
Insert two M3 square nuts
-
Attach the BearMera on the Bear X axis (only the bearings are visible on this picture)
-
Make sure the nozzle fan, stepper motor, pinda and hotend fan cables are routed in between the smooth rods
-
Close the top bearings using four M3x18 screws and the top of x_carriage_back.
-
Do not over tighten the four M3x18 screws.
-
-
-
Route the belt
-
If you have trouble inserting the belt, it might be due to an extrusion multiplier issue (over-extrusion) or due to the use of a non-genuine or non-2GT belt. Check the step 5 of Preflight check and disassembly chapter for more details.
-
Add the bottom of x_carriage_back as shown in the second image. Make sure to not pinch any wires. You should not have to use any force to close it
-
Secure the x_carriage_back with an M3x18 screw
-
And two M3x10 screws
-
Double check that no wires are pinched, this is very important!
-
-
-
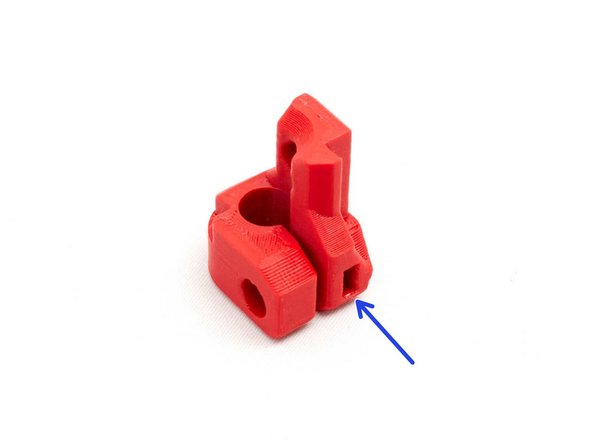
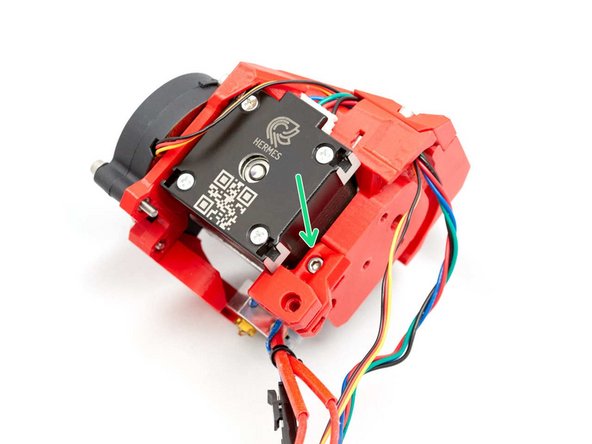
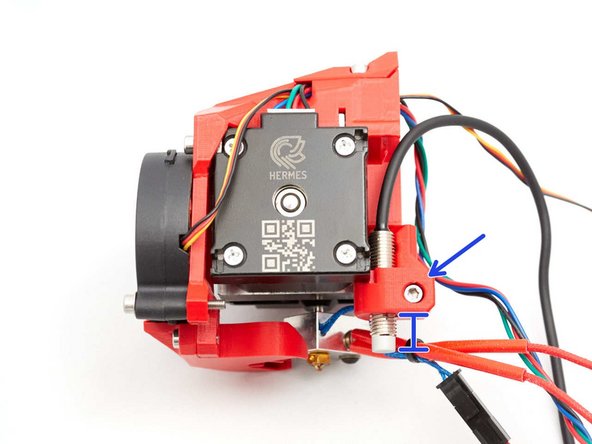
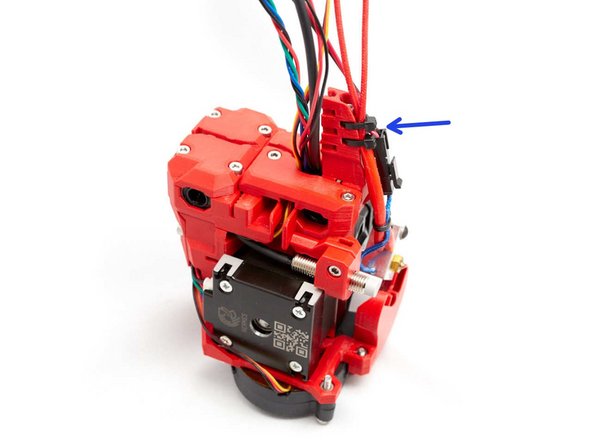
Screw cable_guide_back_a and cable_guide_back_b to the x_carriage using an M3x40 screw
-
The M3x40 screw should be at a slight angle to the horizontal while you are tightening it.
-
The M3x40 screw should be at a slight angle to the horizontal while you are tightening it.
-
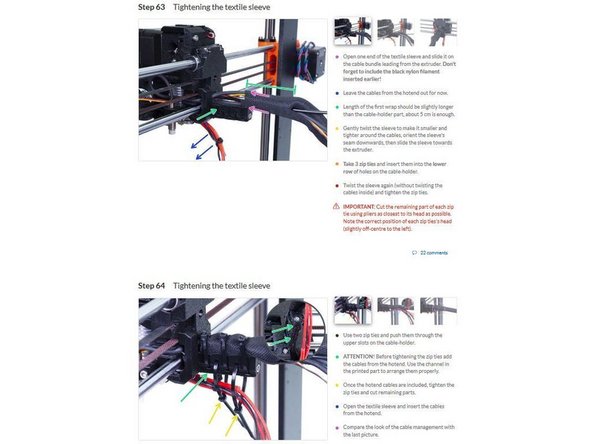
Add the textile sleeve as explained in the Prusa manual for MK3S (steps 62 to 64): https://manual.prusa3d.com/Guide/5.+E-ax...
-
-
-
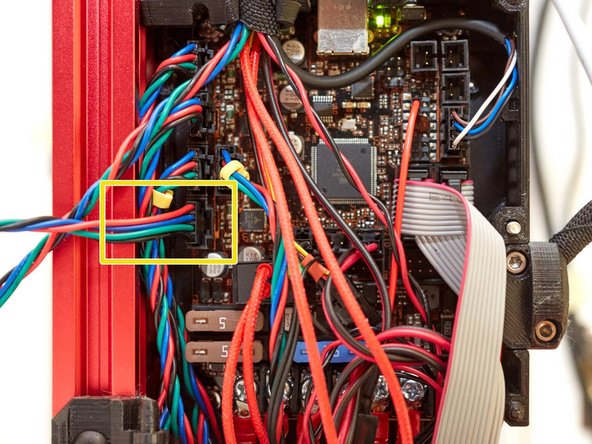
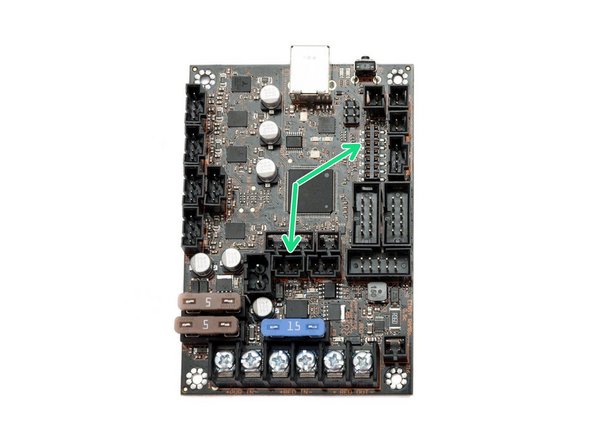
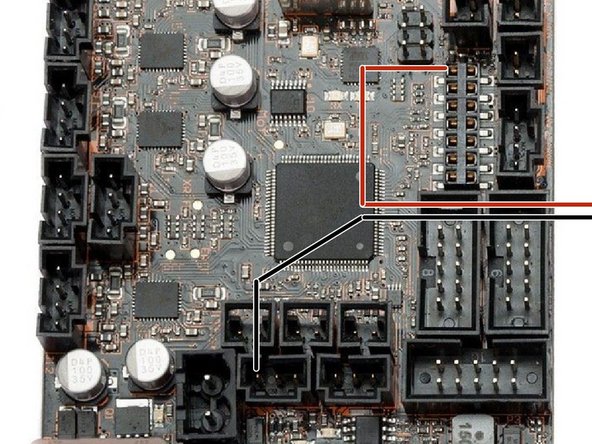
Verify the wire positions and adapt them if they are not matching the pictures. Then, connect your extruder stepper to your Rambo Mini or Einsy Rambo
-
-
-
This step is for MK3(S) only, go to next step for MK2.5(S) or MK2(S).
-
Do not use the Noctua coming with your Prusa printer, it is not strong enough for the Hemera. As of today the E3D fan specs are unknown and so we recommend to use the fan that comes with your Hemera.
-
Hemera comes in 12V or 24V version. The 24V version has a 24V hotend fan that needs to be used on MK3(S) Einsy Rambo. The 12V version has a 12V hotend fan that needs to be used on MK2(S) or MK2.5(S) Rambo Mini. Double check the voltage of the hotend fan on its sticker.
-
MK3 only: As the Hemera hotend fan works with 24V you will need to connect it differently (Prusa uses 5V fans). You can use jumper wires or build an adapter.
-
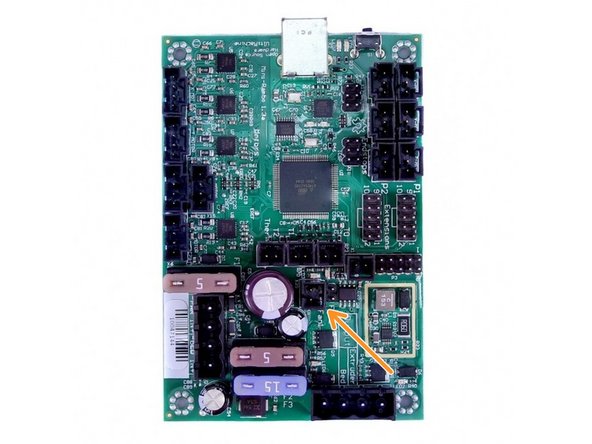
+24V goes to pin1 of J19 connector
-
Ground goes to left pin of the hotend fan connector
-
-
-
This step is for MK2.5(S) only, go to the next step for MK2(S) or previous step for MK3(S) .
-
Do not use the Noctua coming with your Prusa printer, it is not strong enough for the Hemera. As of today the E3D fan specs are unknown and so we recommend to use the fan that comes with your Hemera.
-
Hemera comes in 12V or 24V version. The 24V version has a 24V hotend fan that needs to be used on MK3(S) Einsy Rambo. The 12V version has a 12V hotend fan that needs to be used on MK2(S) or MK2.5(S) Rambo Mini. Double check the voltage of the hotend fan on its sticker.
-
MK2.5(S) only: You need to remove the adapter for the hotend fan (black-red-yellow adapter) and plug the fan directly into the hotend fan connector
-
+12V goes to top pin of the hotend fan connector
-
Ground goes to bottom pin of the hotend fan connector
-
-
-
This step is for MK2(S) only, go to the previous steps for MK2.5(S) or MK3(S)
-
Do not use the Noctua coming with your Prusa printer, it is not strong enough for the Hemera. As of today the E3D fan specs are unknown and so we recommend to use the fan that comes with your Hemera.
-
Hemera comes in 12V or 24V version. The 24V version has a 24V hotend fan that needs to be used on MK3(S) Einsy Rambo. The 12V version has a 12V hotend fan that needs to be used on MK2(S) or MK2.5(S) Rambo Mini. Double check the voltage of the hotend fan on its sticker.
-
MK2(S) only: Connect the hotend fan to the Rambo Mini just like on stock Prusa MK2(S). Make sure the polarity is correct.
-
+12V goes to top pin of the hotend fan connector
-
Ground goes to bottom pin of the hotend fan connector
-
-
-
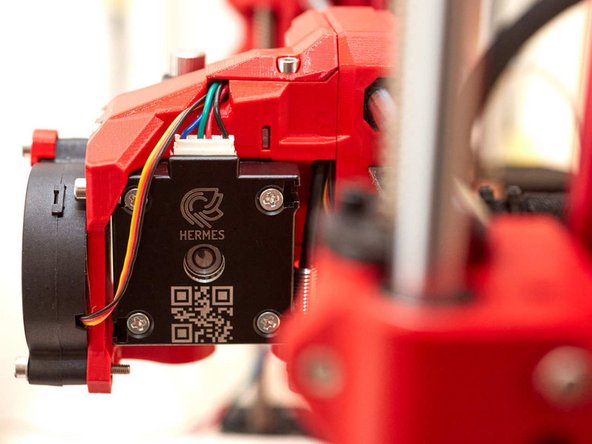
Follow the original Prusa manual to connect the other cables of your extruder to the Mini-Rambo / Einsy-Rambo:
-
-
-
-
-
-
Congratulations you have finished this chapter :-)
-
Go to the next chapter: 4. Adjustments
-


Cancel: I did not complete this guide.
4 other people completed this guide.
