
-
-
This step is only for Bear frame MK2.5(S) and MK3(S).
-
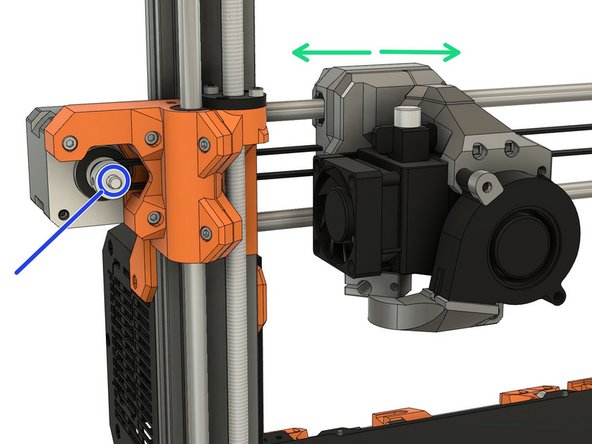
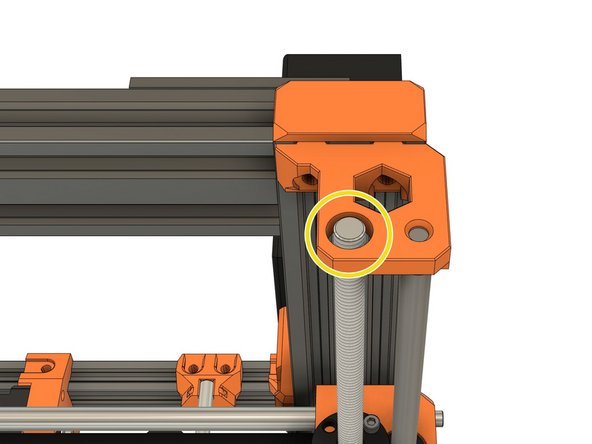
y_axis_end_stop
-
Clip the y_axis_end_stop on the left smooth rod, at the front, as shown in the image
-
This part prevents the PINDA to crash into the screws on the back of the heated bed for MK2.5(S) and MK3(S)
-
-
-
ptfe_collet_clip
-
Slide a PTFE tube into the collet. The length does not matter. The end needs to be cut flush.
-
Move up the collet while keeping the PTFE in place. Clip the ptfe_collet_clip to secure the collet.
-
The ptfe_collet_clip isn't mandatory, you can use the Hemera without it. We recommend to use it if you like to have to have things tight and secure
-
-
-
Hot-tighten the Hemera nozzle to 3Nm at 285°C. Follow the official instructions of the E3D Hemera assembly guide here (step 18): https://e3d-online.dozuki.com/Guide/02+-...
-
-
-
Let the extruder cool down.
-
Place a sheet of paper on the heated bed. Manually lower the X axis until the Hemera nozzle is touching the paper.
-
Make sure the X axis is flat (you can slowly move the Hemera left and right while looking at the nozzle distance from the bed).
-
Loosen the PINDA locking screw and place an object of 1mm thickness under the Pinda (like the middle section of a zip tie).
-
Gently move the PINDA down until it is touching the zip tie.
-
Tighten the PINDA locking screw to secure it in place.
-
Use a plier if it is hard to reach the probe with your fingers during adjustment.
-
-
-
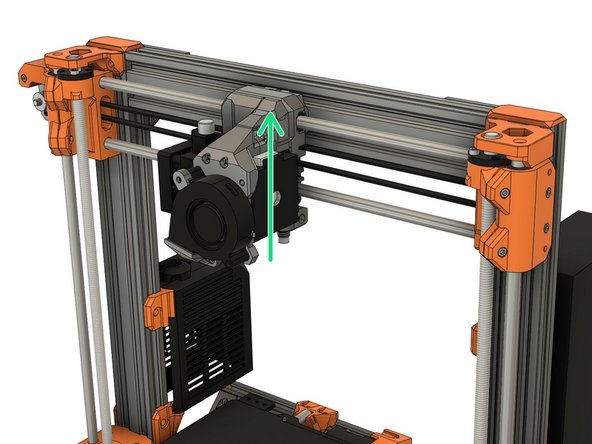
Plug in and turn on the printer
-
Using the screen menu, move the X axis up until it crashes into the Z tops. The stepper motors will skip, making a noise - this will not damage the motors
-
Using the screen menu, move the X axis down until the nozzle is approximately 10mm from the heated bed
-
If the X axis is stopping before crashing into the Z tops, move the X axis a little further down and power cycle your printer. You will then be able to complete the step
-
It is possible that with the weight of the Hemera the X axis is moving down on one side when the printer is off for some time. If this happens, move the X up until it crashes as explained here. Note that his can also happen to stock Prusa printer (and so stock Prusa extruder)
-
-
-
If you have applied tension to the belt, unscrew the belt tensioner on x_end_idler until the belt is relaxed.
-
Loosen the screws that secure the trapezoidal nuts. This is to ensure that the Trapezoidal nuts 'self-centre' on the lead screws.
-
Make sure the trapezoidal nuts are moving freely.
-
Alternate between all 4 screws evenly while tightening (alternate between both sides during the process). Don't apply any lateral force on the trapezoidal nuts.
-
-
-
Loosen the two pulley set screws a little.
-
Align the pulley with the belt hole of the x_end_motor.
-
Tighten the set screws alternately.
-
Verify that the belt is not touching the x_end_motor.
-
Verify that the drive pulley is not touching the X motor.
-
-
-
Grip the X motor shaft with pliers to prevent it moving (grab the flat side of the shaft).
-
Tension the belt, by tightening the screws in the x_end_idler. Do this while trying to move the extruder to the left or right. The belt should stay straight and should not bow up and skip over the drive pulley teeth.
-
No need to be very precise with the belt tension here as the final tension will be improved in a further step.
-
-
-
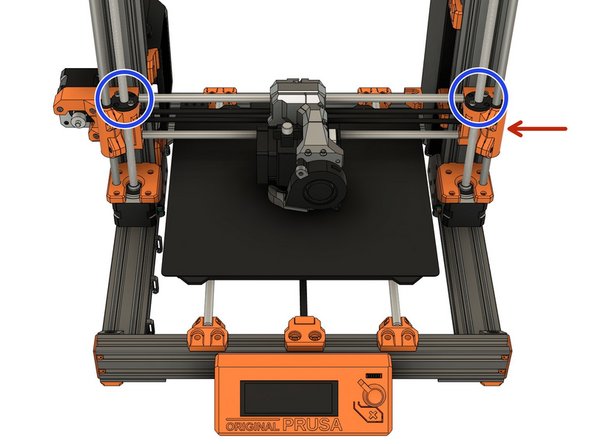
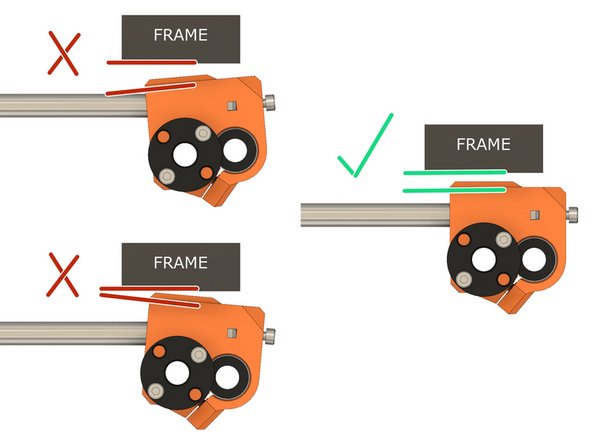
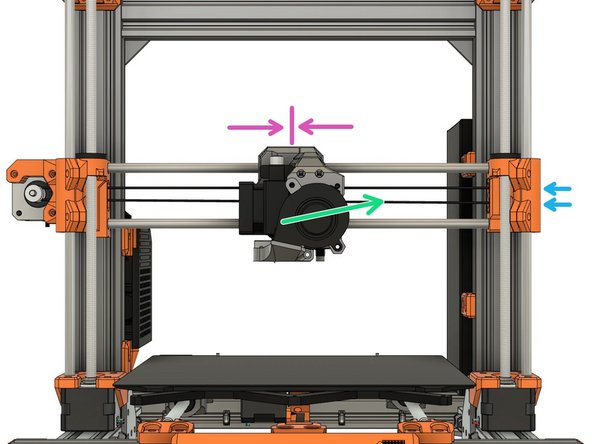
Not all X axis have the exact same length because of tolerances. This step will adjust the X end idler to your X axis length.
-
Adjust both M3x10 screws to have the x_end_idler parallel to the frame.
-
First image, top left: shows when the X axis is too short. In this case you need to tighten the two M3x10 screws.
-
First image, bottom left: shows when X axis is too long. In this case you need to unscrew the two M3x10 screws.
-
If you have difficulty to see if the x_end_idler is parallel to the frame you can use a thick ruler or a square like on the first image.
-
It might happen that with excess tension on the M3x10 screws, the Z smooth rods will start to be off center on the Z tops. In this case release tension on the M3x10 screws even if the x_end_idler is not totally parallel to the frame.
-
-
-
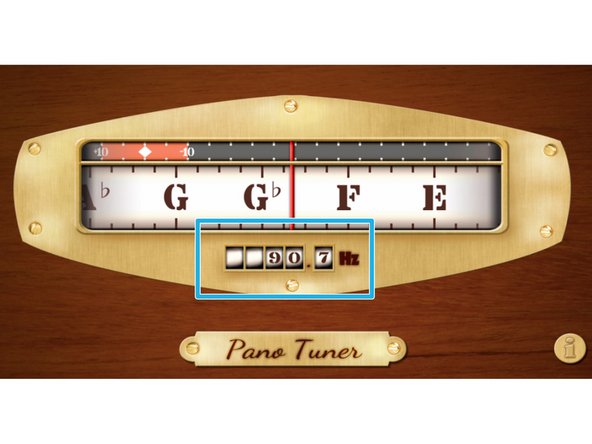
Download and install the Pano Tuner application (developed by Kaleloft LLC) on your smartphone. Android Google Play link. Apple Store link.
-
Turn off the printer (if your hotend is higher than 50°C, let the hotend cool down first until the hotend fan stops spinning)
-
Launch the Pano Tuner app and place your smartphone on the heated bed. Make sure there is no noise in the room that could disrupt the measure (like a ceiling fan).
-
Move the extruder to the middle of the X axis.
-
Pinch the lower belt to make it vibrate. Don't pinch too much as it might touch the carriage and produce a wrong frequency
-
Adjust the belt tension until you have a value around 90Hz. Between each measurements, move the extruder to full left and right and then center it again.
-
It is very important to move left and right the extruder between each measures to relax some tension in the belt.
-
If your belt is new, you can repeat this procedure after few prints. A new belt will loosen on the first hour of use.
-
-
-
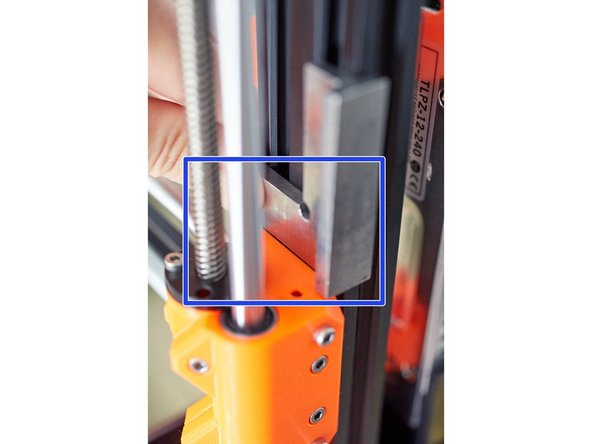
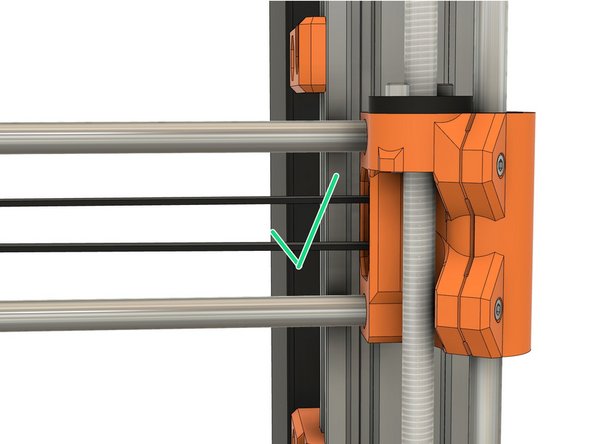
Verify the x_end_idler_tensioner is not sticking out of the x_end_idler.
-
If x_end_idler_tensioner is sticking out then your X axis calibration might fail.
-
-
-
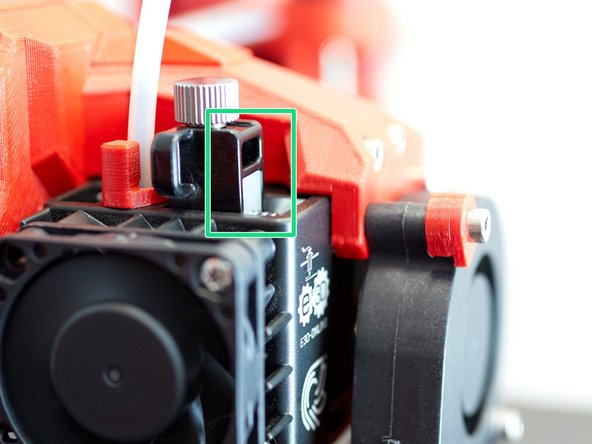
As a starting point to adjust the extruder tension, E3D recommends to rotate the tensions screw until the white part is flushed with the front of the black part.
-
-
-
Congratulations you have finished this chapter :-)
-
Go to the next chapter: 5. Software configuration
-


Cancel: I did not complete this guide.
3 other people completed this guide.
