-
-
If you haven't check the Z axis parts during the preflight check then you should do it now or you might have problem during this chapter.
-
Note that in this chapter you will see images of MK3(S) Y carriage but all steps are exactly the same for MK2(S) and MK2.5(S).
-
-
-
Make sure you have removed the original lead screw covers as specified in the preflight check and disassembly guide
-
This is not optional, the original lead screw covers are not compatible with the Bear Z motor mounts.
-
Screw the Bear z_leadscrew_caps on both motors.
-
The z_leadscrew_caps should screw down to the Z motor but should not be tight at all. Make sure the lead screw can turn freely.
-
-
-
Insert 2x M5x10 screws in the z_motor_mount.
-
Engage 2x t-nuts on the M5 screws (1-2 turns) and place them vertically.
-
Repeat with the remaining z_motor_mount.
-
-
-
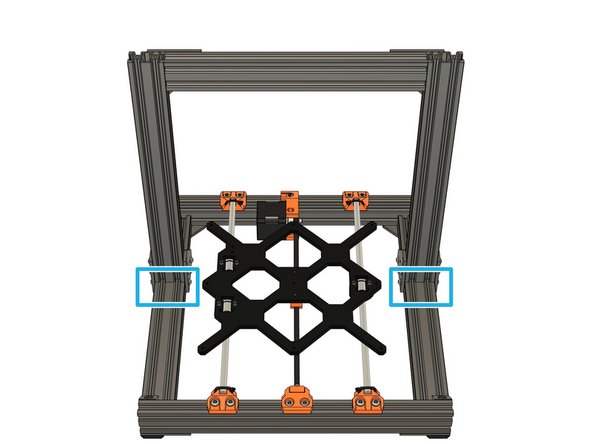
Make sure this section is clean of dust, it will be used as reference for the z_motor_mounts.
-
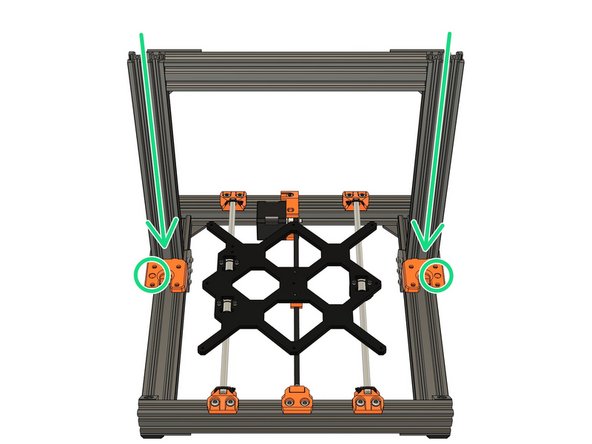
Slide the z_motor_mount from the top of the frame. Note the orientation, the hole for the Z smooth rods should face outside the frame
-
Double check the orientation of your z_motor_mount or it will make the next steps impossible.
-
-
-
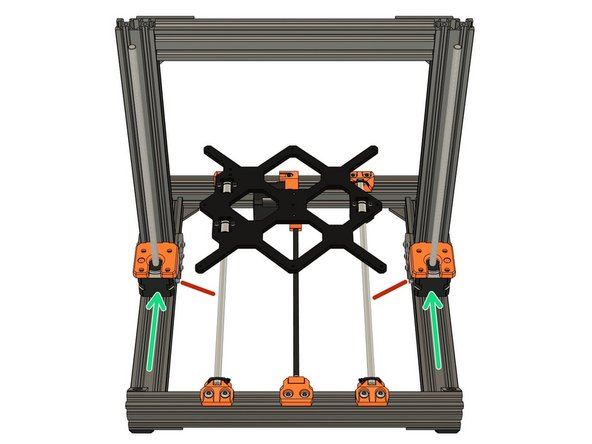
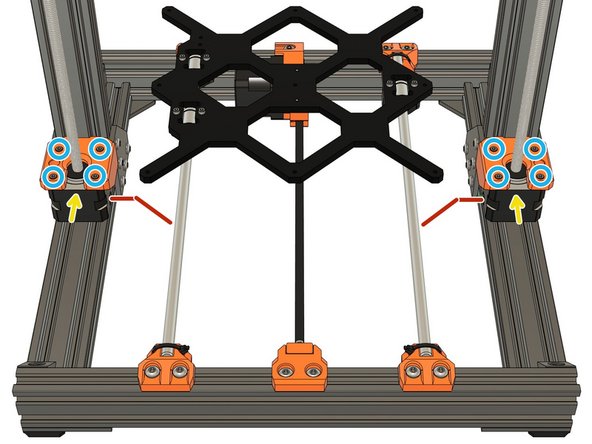
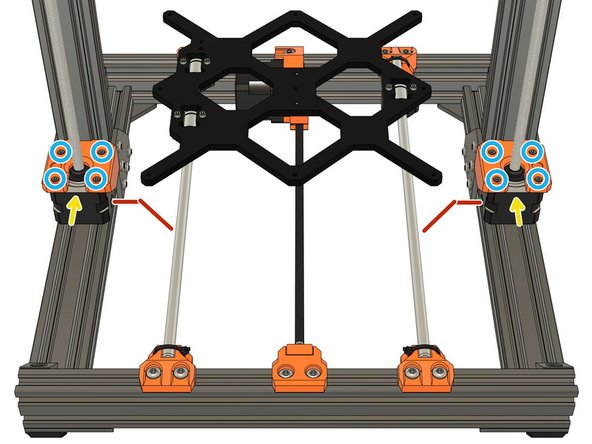
Slide the Z motors in the z_motor_mounts. The motor cable should be oriented inside the frame (red lines on the images).
-
Secure the Z motors in place with 8x M3x10 screws (reused from your original Prusa). Press the motor in the direction of the yellow arrows while tightening incrementally the screws.
-
Note that the previous z_motor_mounts of Bear 2.0 was using M3x12 screws and they will be too long for these new mounts.
-
Check the orientation of your motor cables.
-
-
-
In this step we prepare the X axis to later assemble it on the Z axis.
-
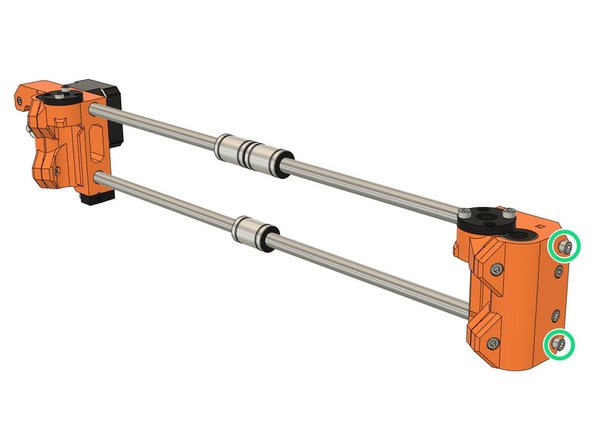
If you are using the Bear X axis or Original Prusa MK2(S)/MK2.5(S) X axis you need to unscrew a little the smooth rods screws (approx. 2mm).
-
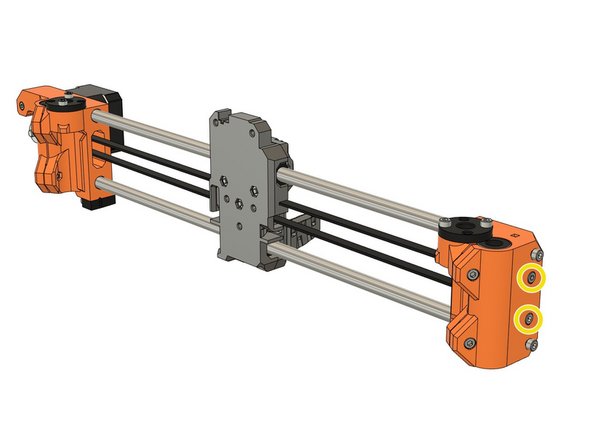
If you still have the X carriage (or extruder) in place you must release the belt tension in X axis.
-
Bear extruder and X axis (BearExxa), BearMera of Bear X axis with Bondtech extruder: release tension using the belt tensioning screws.
-
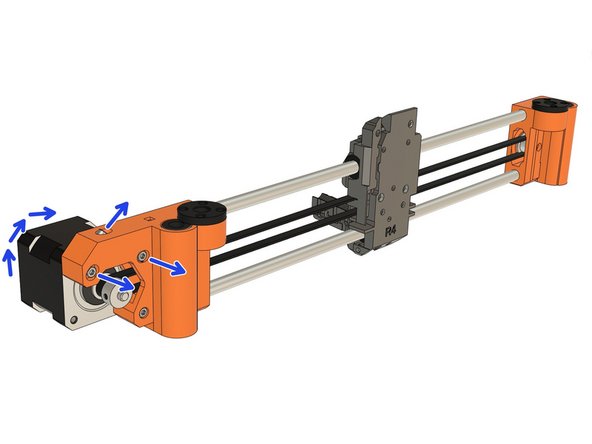
Original Prusa MK3(S): remove the 2x top motor screws and release tension of the screw on top of the arm. Then rotate the X motor.
-
Original Prusa MK2(S) or MK2.5(S): remove the 2x top motor screws and rotate the X motor.
-
Be careful, if you still have the X carriage (or the extruder) in place you will have to disassemble the Z motors to insert the X axis in the next step.
-
-
-
Be careful with this step as you might damage the lead screw nuts (black nuts on the X ends).
-
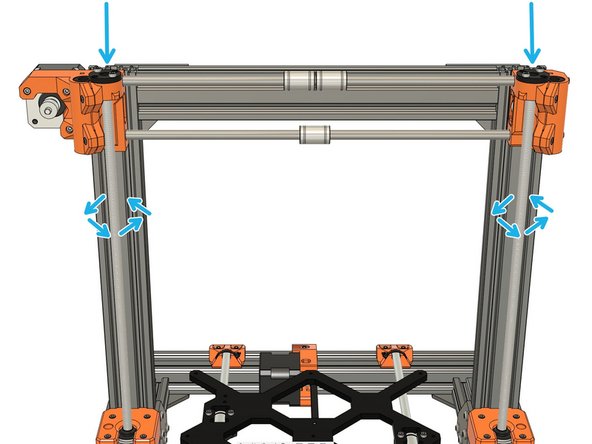
Place the X axis on top of the Z lead screws. Carefully rotate by hand the Z lead screw to engage and move down the X axis.
-
Be very careful, never force on the lead screw nuts or you might damage them.
-
Rotate the lead screws in synchronization.
-
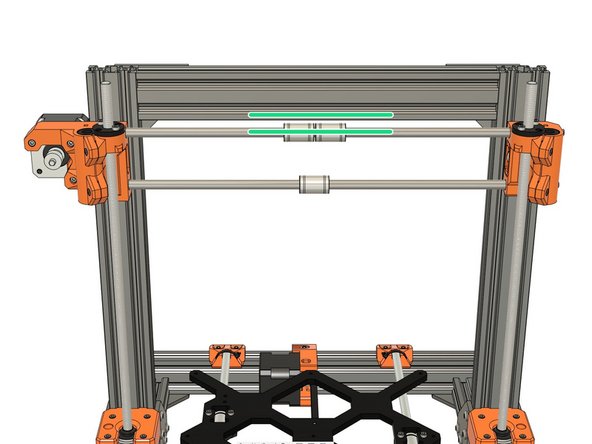
Continue to rotate the Z lead screws simultaneously until you can align the top X smooth rod with the bottom of top Z axis extrusion.
-
Verify the X axis is parallel and make correction if necessary.
-
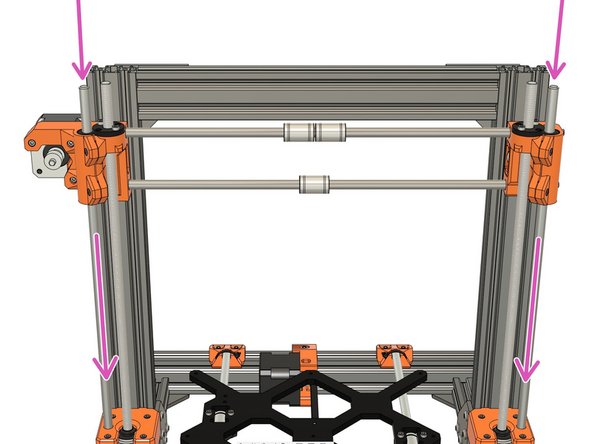
Very gently slide the two Z smooth rods (320mm long) down to the Z motors. The smooth rods must be fully inserted until they touch the Z motors (you can hear a "metallic click" when you reach the motor).
-
Verify the Z smooth rods are fully inserted down to the Z motors. This is very important as it might affect the alignment of your X axis later.
-
-
-
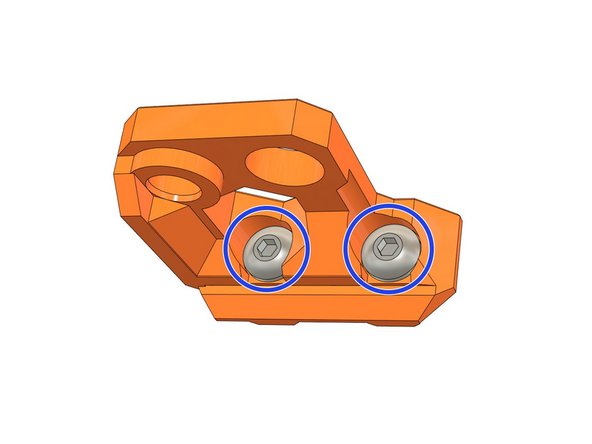
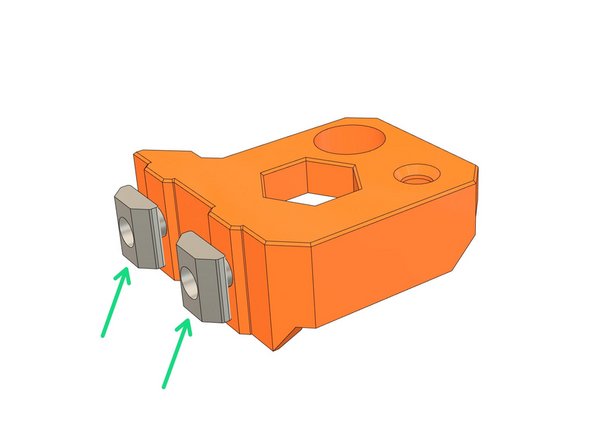
Insert 2x M5x10 screws in one of the z_top.
-
Engage 2x t-nuts on the M5 screws (1-2 turns) and place them vertically.
-
Repeat with the remaining z_top.
-
-
-
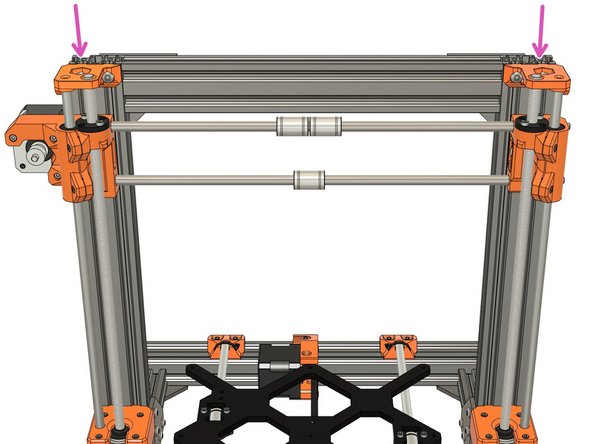
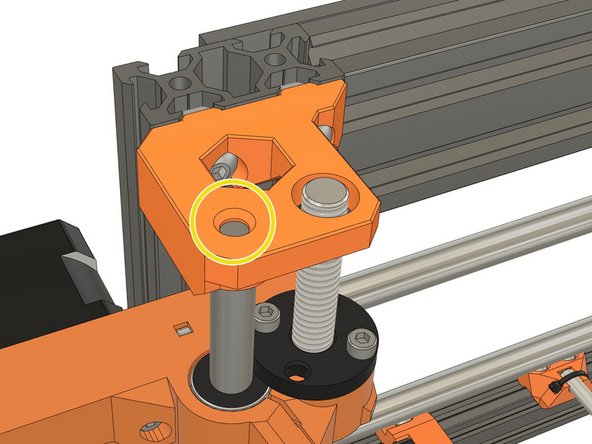
Install the z_tops on top of the Z axis. T-nuts must go into the extrusion's grooves and the smooth rods in the smallest of the two front holes.
-
You must press down the z_tops until the smooth rod is touching on top of the hole.
-
This is very important as it might affect the alignment of your X axis later.
-
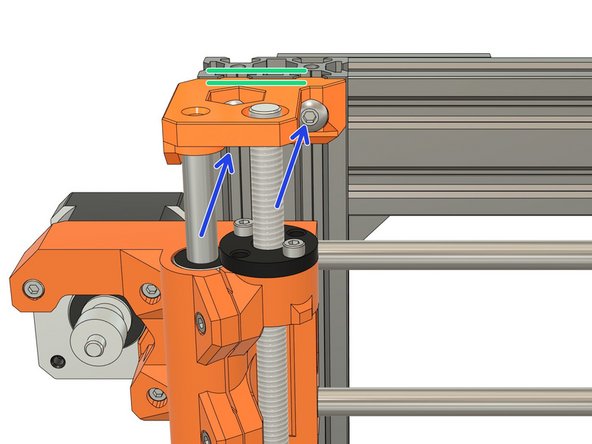
Make sure the z_tops are parallel to the top of the extrusion
-
Tighten the 2x M5x10 screws.
-
Double check that the smooth rods are fully inserted in the z_tops.
-
-
-
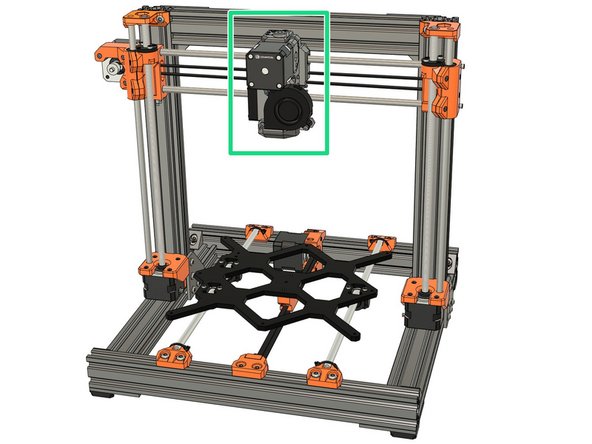
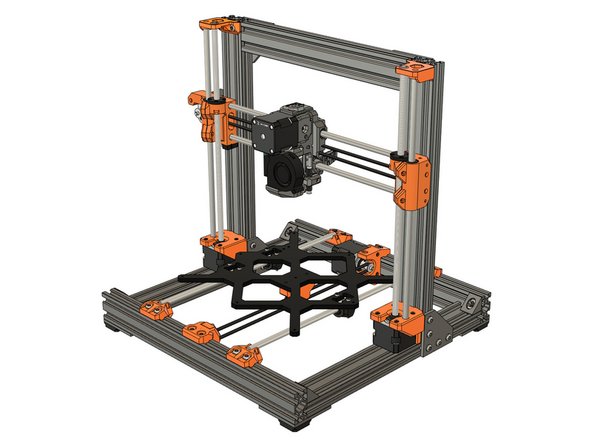
In this chapter you will have to follow external guides. As the Bear frame supports different extruders and X axis it would make this guide too long and hard to follow. Thank you for your comprehension :)
-
Reinstalll the extruder on the X axis by following the external guide(S) according to your extruder and X axis:
-
BearExxa (Bear extruder and X axis): start with 3. Extruder, then 4. Extruder and X axis assembly up to step 10 and finish with 5. Final adjustments and calibration up step 8.
-
BearMera (E3D Hemera): start with 3. BearMera extruder up to step 14, and then 4. Adjustments.
-
Bondtech on Bear X axis: follow our guide here.
-
Original Prusa extruders installation guides: MK3S, MK2.5S, MK3 (spiral wrap), MK3 (textile sleeve), MK2.5 (spiral wrap), MK2.5 (textile sleeve), MK2S.
-
Bondtech extruder on original Prusa X axis: choose the guide corresonding to your extruder on support.bondtech.se/c/Prusa.
-
-
-
Congratulations you have finished this chapter :)
-
Go to the next chapter: 07. Heated bed.
-


